21 DIY Party Wall Decoration Ideas for Kids
A memorable kids’ party wall does not need a professional balloon crew, a shopping cart full of single-use décor, or three frantic hours before guests arrive. Parents repeatedly say the same thing: children notice the fun long before they notice whether every streamer is straight. The smartest DIY party wall is therefore one bold focal area that can be assembled early, photographed well, and removed without leaving the room worse than you found it. These ideas use paper, cardboard, fabric, and familiar craft supplies so you can match a theme without letting the backdrop consume the party.
Before you start: measure the wall, mark the photo zone on the floor, and test your chosen removable adhesive in a hidden spot. Keep cords, tiny loose pieces, pins, and burst balloons beyond the reach of young children. Build complicated elements on lightweight backing sheets first, then hang the finished panels the night before whenever the venue allows it.
Layered Paper Fan Celebration Wall
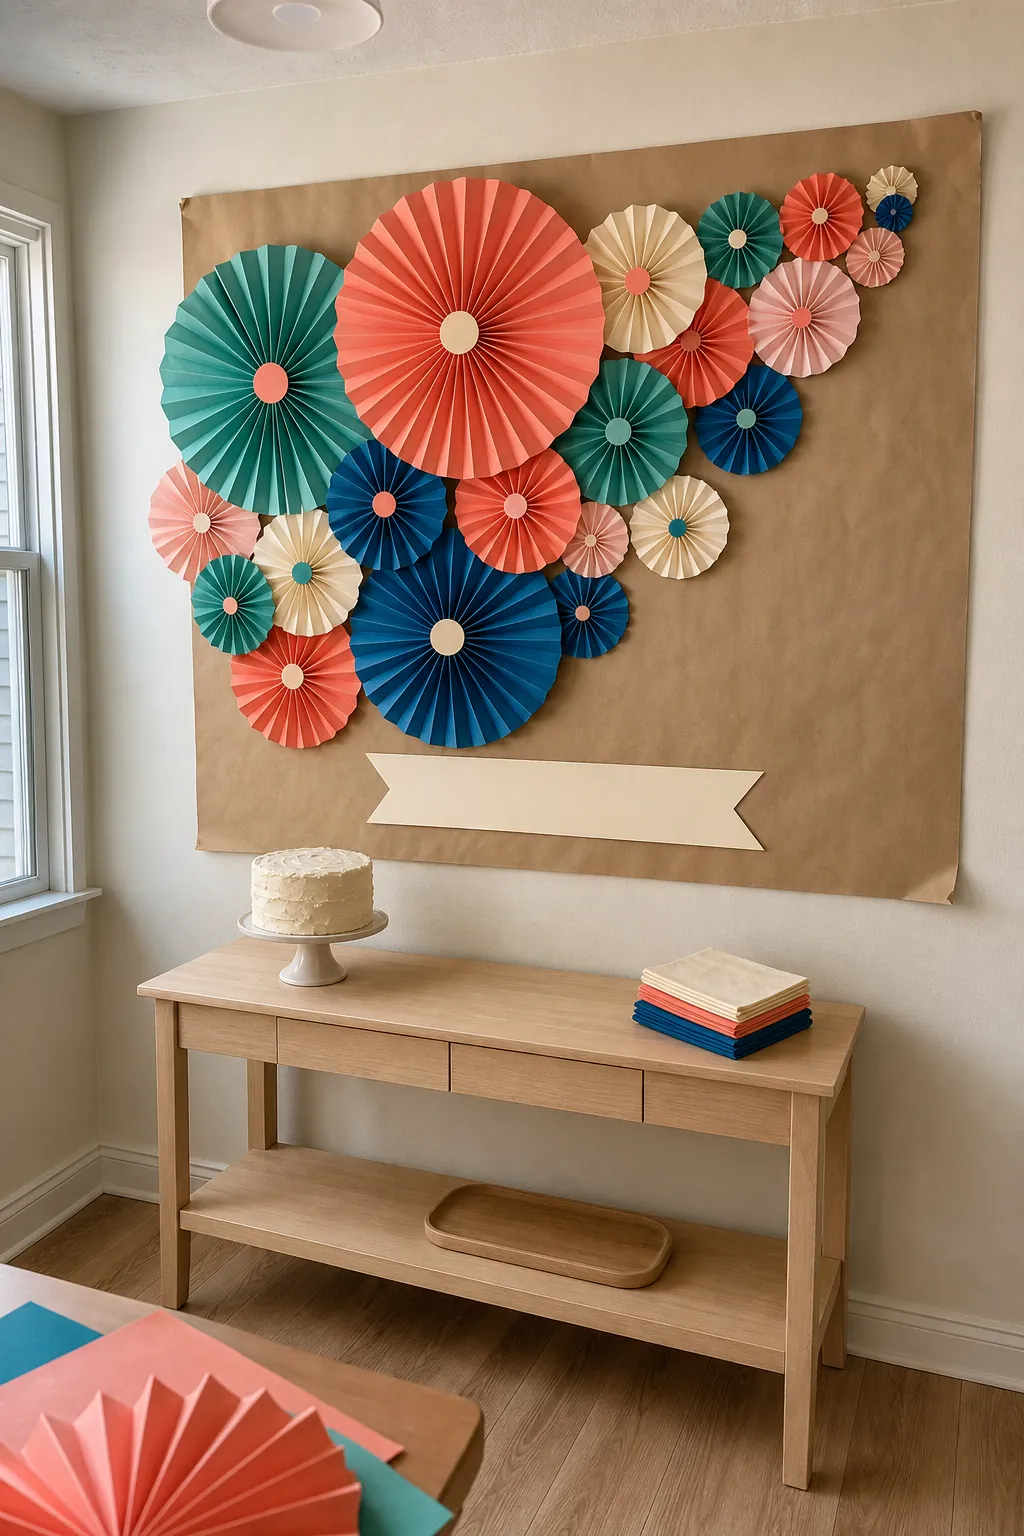
Fold scrapbook paper into accordion strips, join the ends, and open each circle into a fan. Make three sizes and overlap them rather than spacing every fan evenly; the clustered shape looks generous while using less wall area. A limited palette—two theme colors plus one bright accent—keeps inexpensive paper from feeling chaotic. Assemble the fans several days ahead, flatten them for transport, and attach them to a large sheet of kraft paper or foam board so setup becomes one simple hanging job.
Rainbow Streamer Waterfall
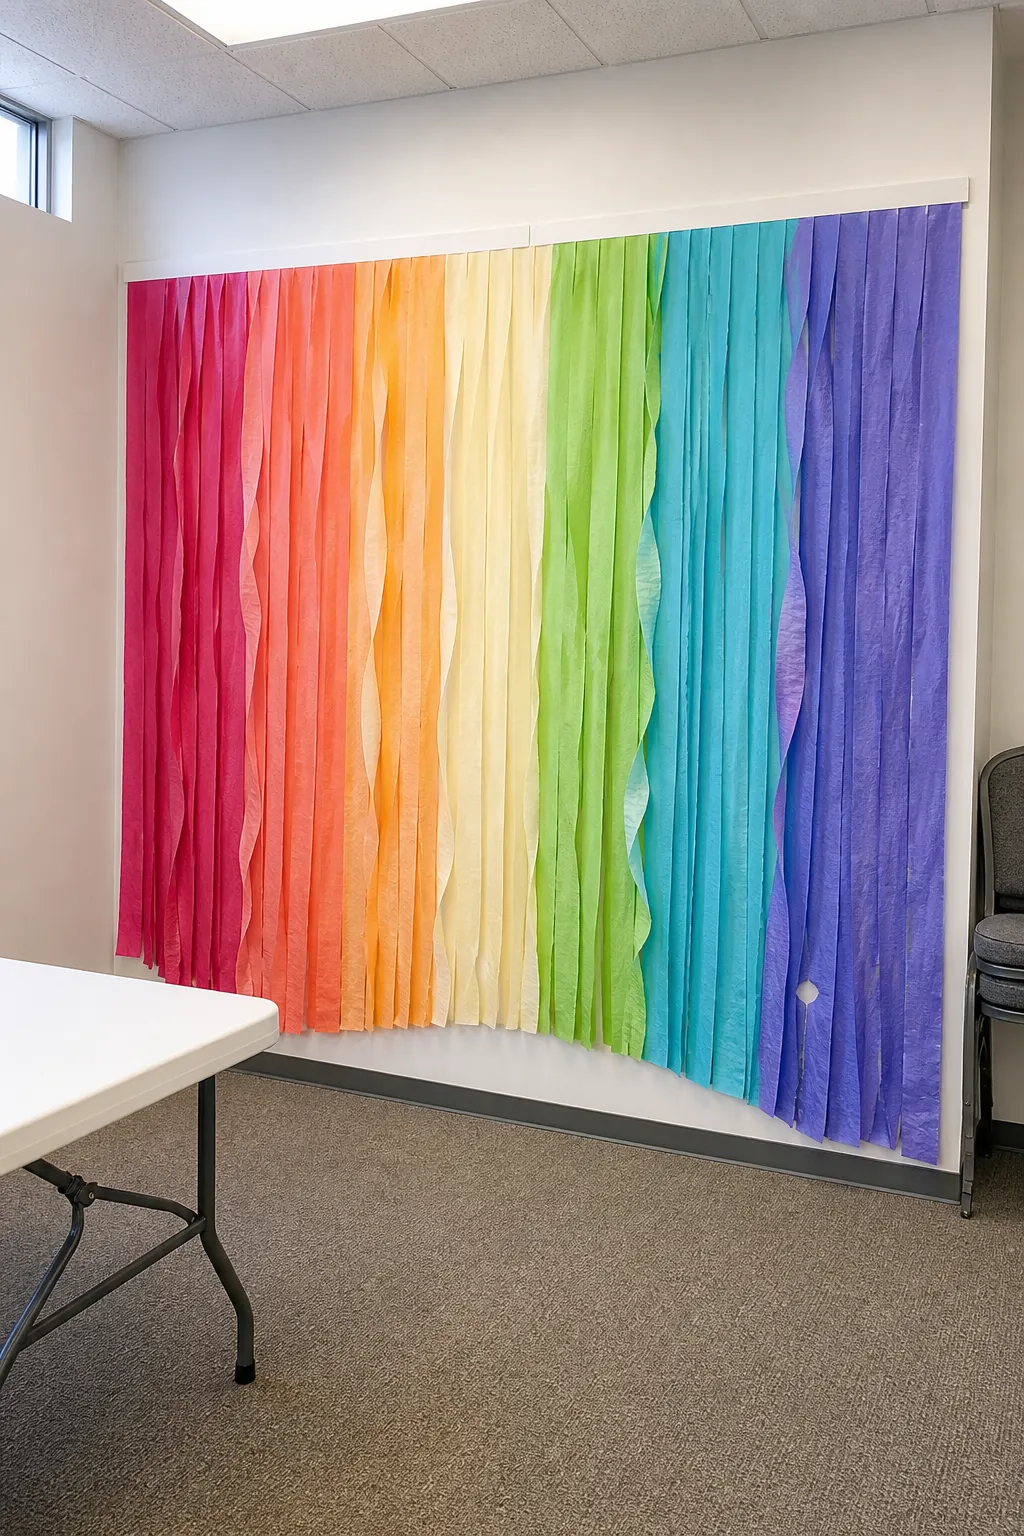
Cut crepe-paper streamers longer than the visible wall and tape their top ends to a removable horizontal strip, not directly across painted drywall. Twist alternating strands once or twice for movement, then trim the bottom into a shallow curve. This is one of the fastest birthday wall ideas for a wide space because imperfect gaps disappear in photographs. Put the darkest color at the outside edges and lighter colors near the center to frame the birthday child without adding a separate arch.
Off-Center Balloon Garland
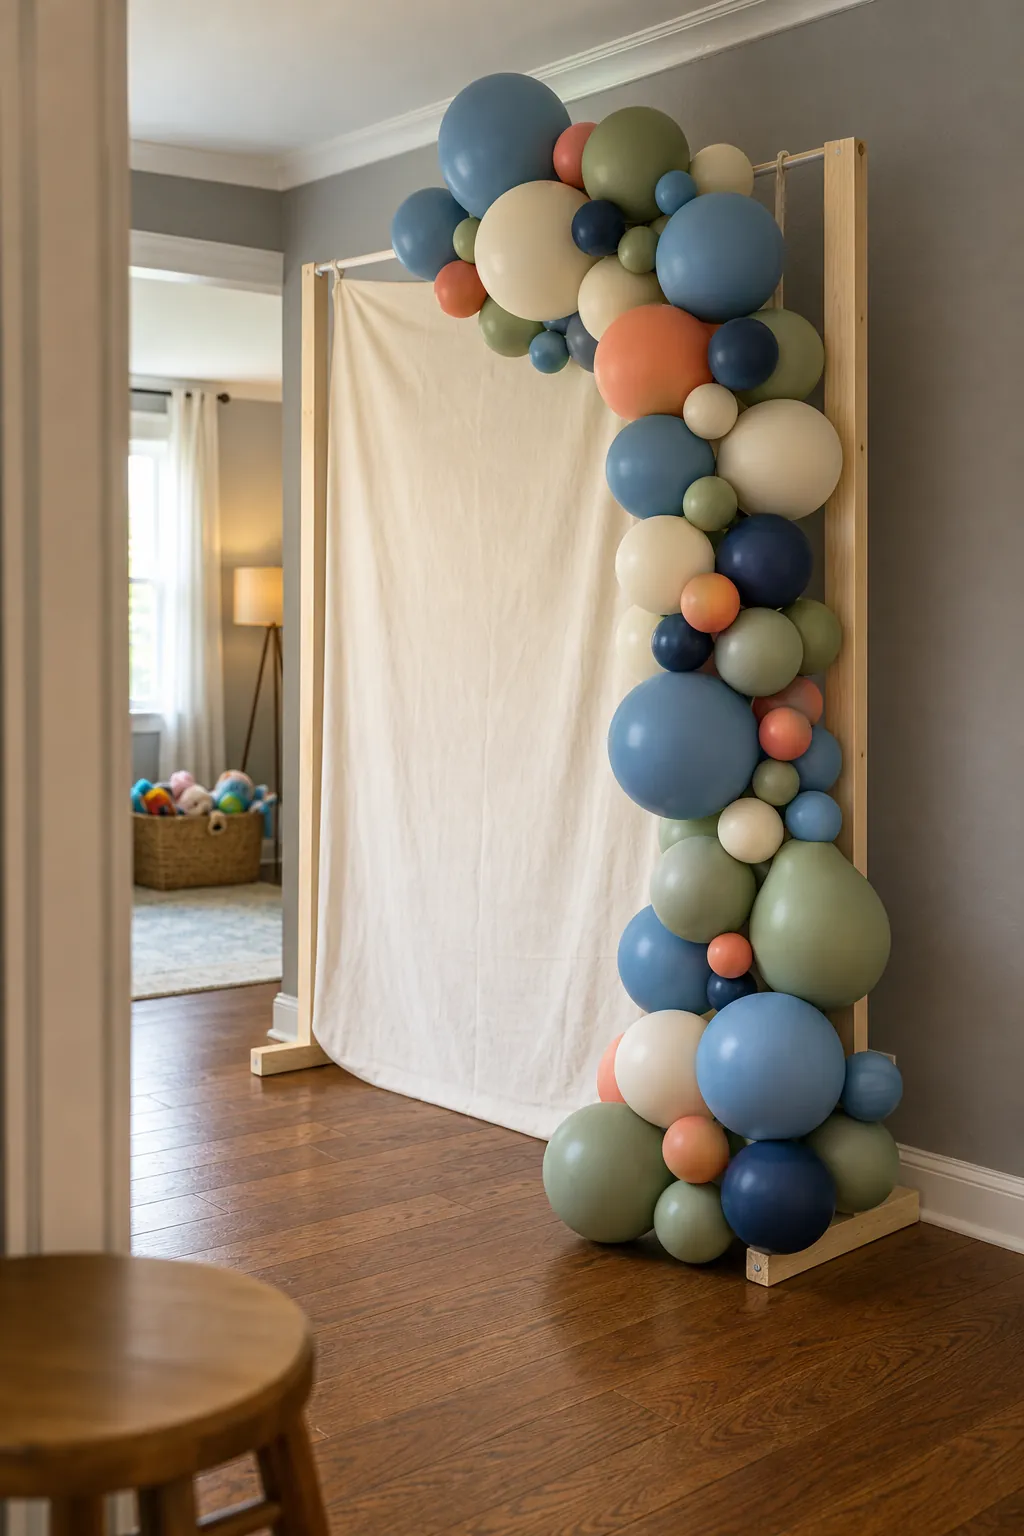
A short asymmetrical garland gives the impression of a full installation with far fewer balloons. Inflate three sizes, thread the tied ends into balloon strip, and hang the strip from secure removable hooks rated for the combined load. Fill only obvious gaps with small balloons. Keep the lower end above grabbing height for toddlers, collect broken pieces immediately, and never rely on packing tape against paint. The blank side of the wall becomes useful breathing room for a name, age, or cake table.
Tissue Tassel Party Banner
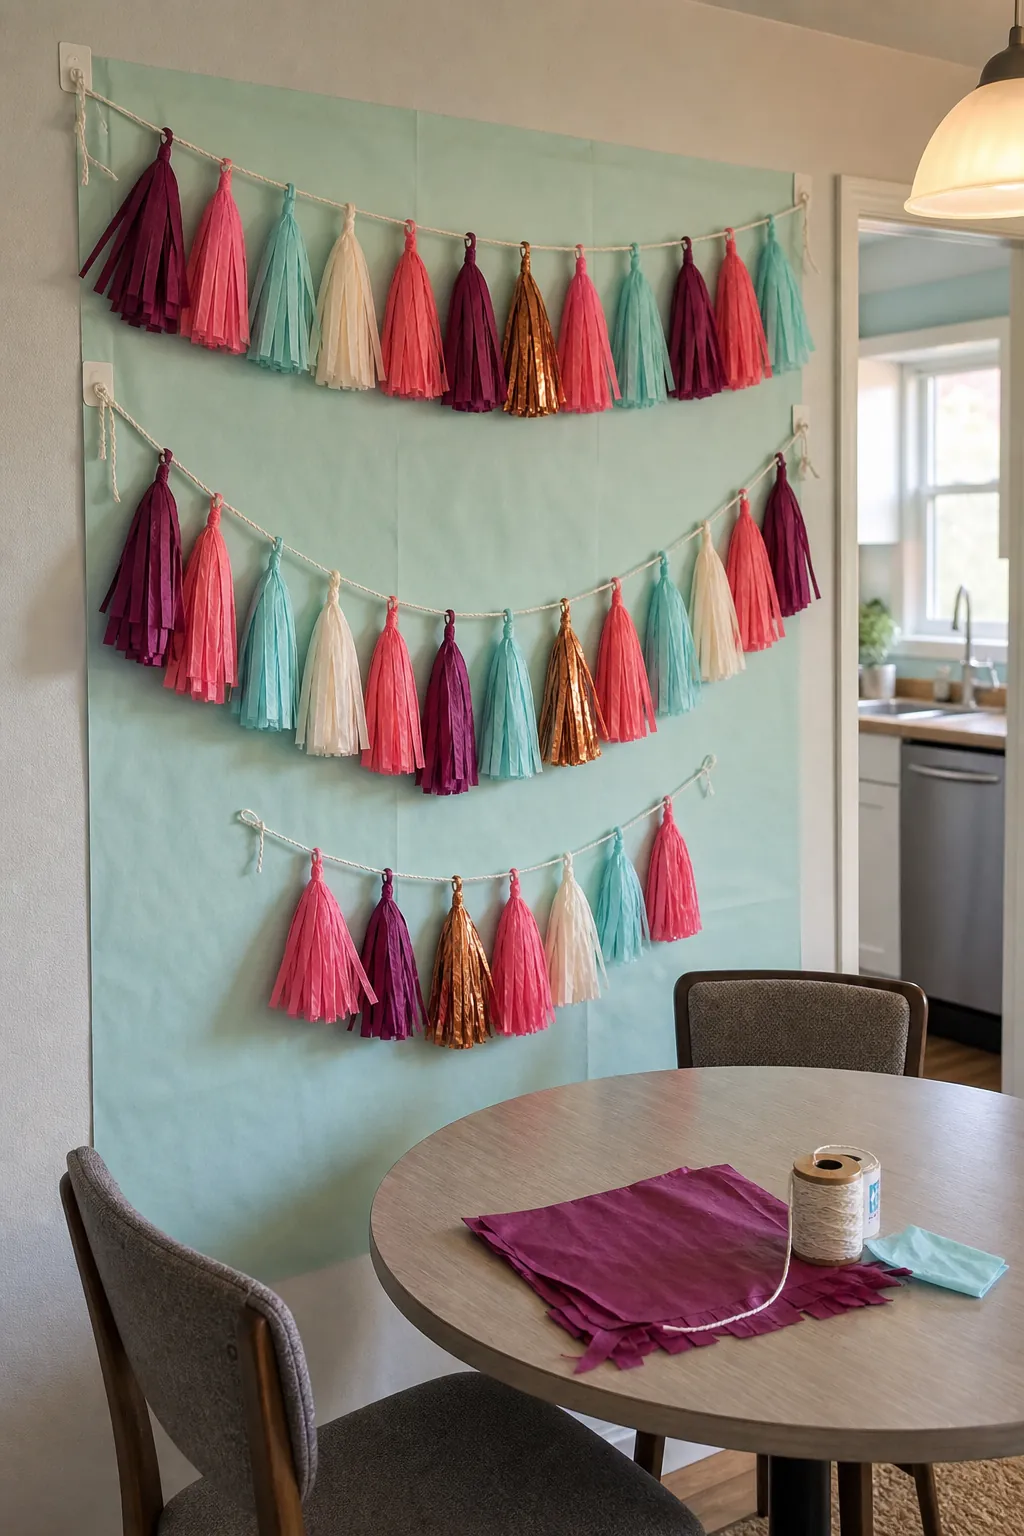
Stack tissue sheets, fringe both ends, roll the uncut center, and twist it around cotton cord. Instead of one lonely strand, hang three shallow swags at different heights. Repeating the same four colors makes this paper party decor feel planned, while metallic tissue used sparingly adds light without glitter cleanup. Tassels are easy to make during a movie, pack flat, and reuse. Tie them to hooks or an existing picture rail so the weight stays off delicate paint.
Cardboard Castle Photo Backdrop
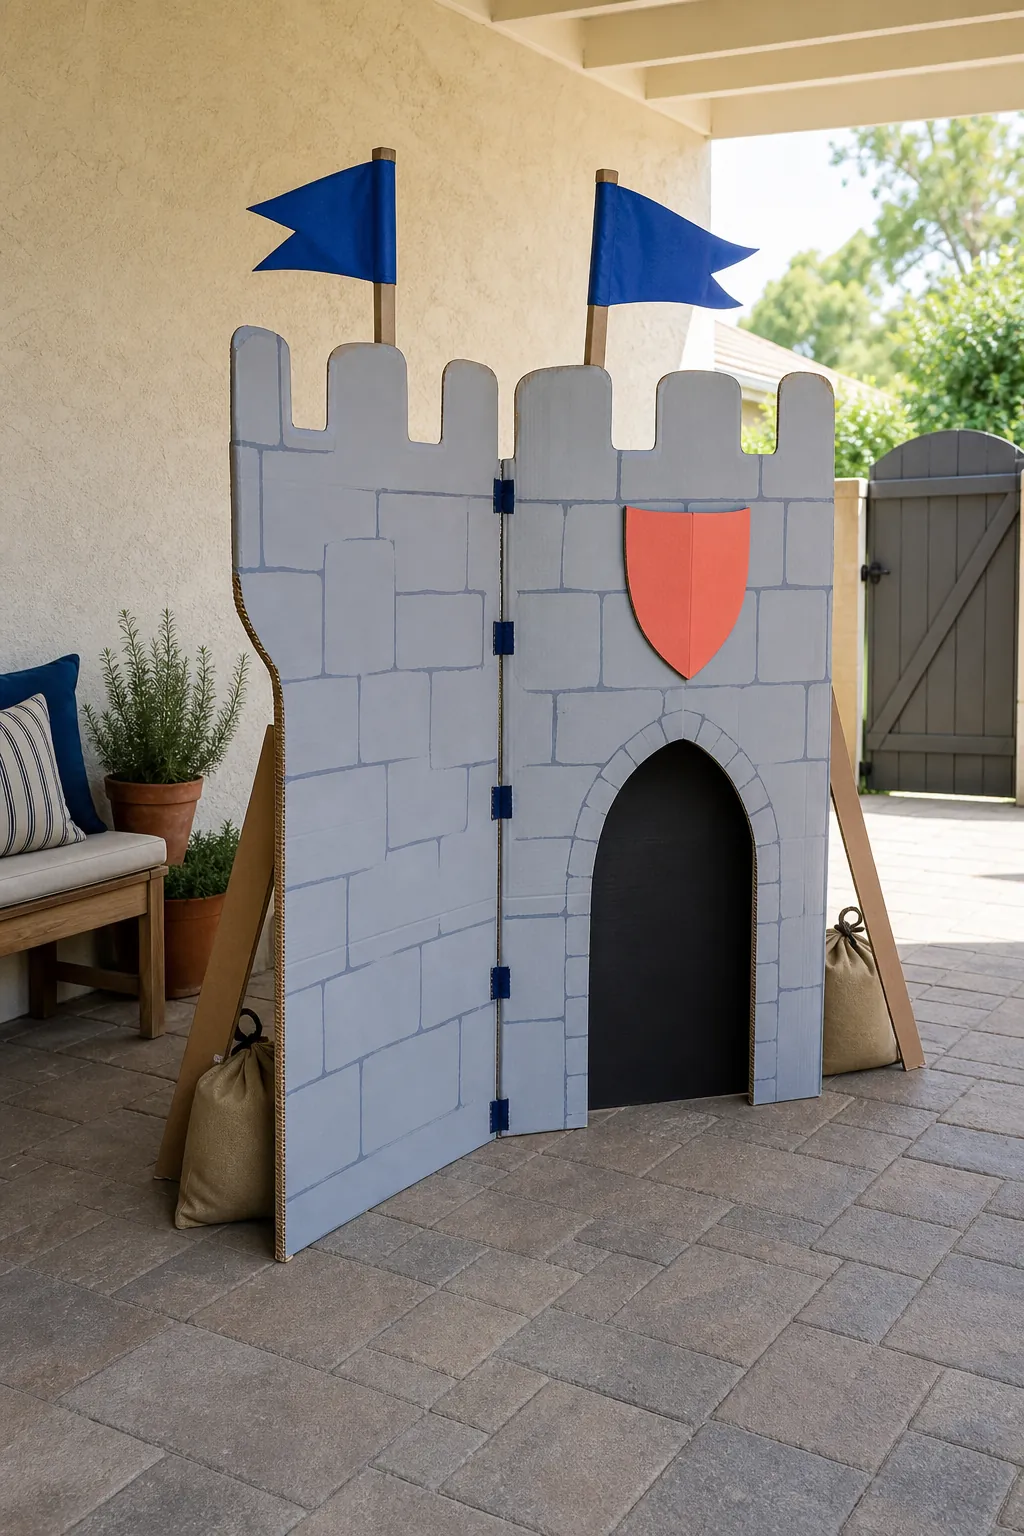
Open large appliance boxes into flat panels, sketch simple towers, and cut crenellated tops before painting. Two hinged panels can stand in front of a wall, which is ideal when adhesives are forbidden. Add drawn stone lines, paper flags, and an arched doorway just large enough to suggest depth without inviting climbing. Weight the rear supports, round every exposed edge, and keep the structure away from exits. After the party, the panels can become a play fort rather than immediate trash.
Giant Age Number Mosaic
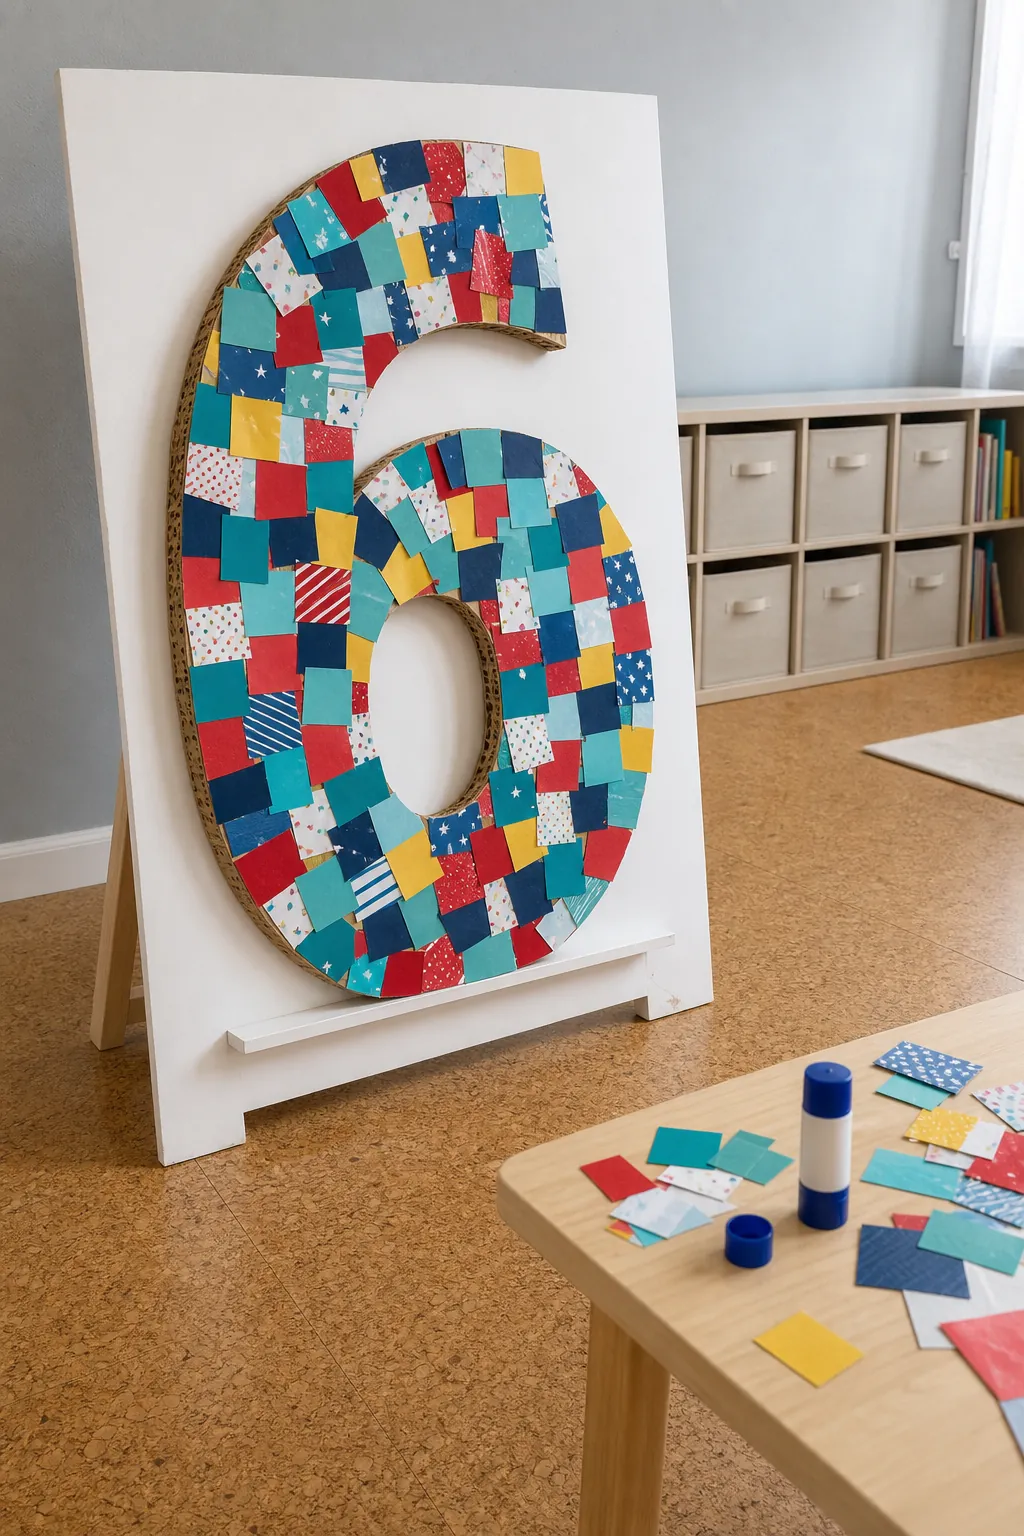
Cut the child’s age from a flattened cardboard box and cover it with small paper squares, tissue rosettes, or leftover gift-wrap pieces. A single oversized number reads more clearly in photos than many tiny decorations. Let the birthday child choose the colors or glue safe pieces in place, turning preparation into part of the celebration. Mount the finished number on a freestanding board or use several removable strips distributed across the back so no single point carries all the weight.
Oversized Paper Flower Garden
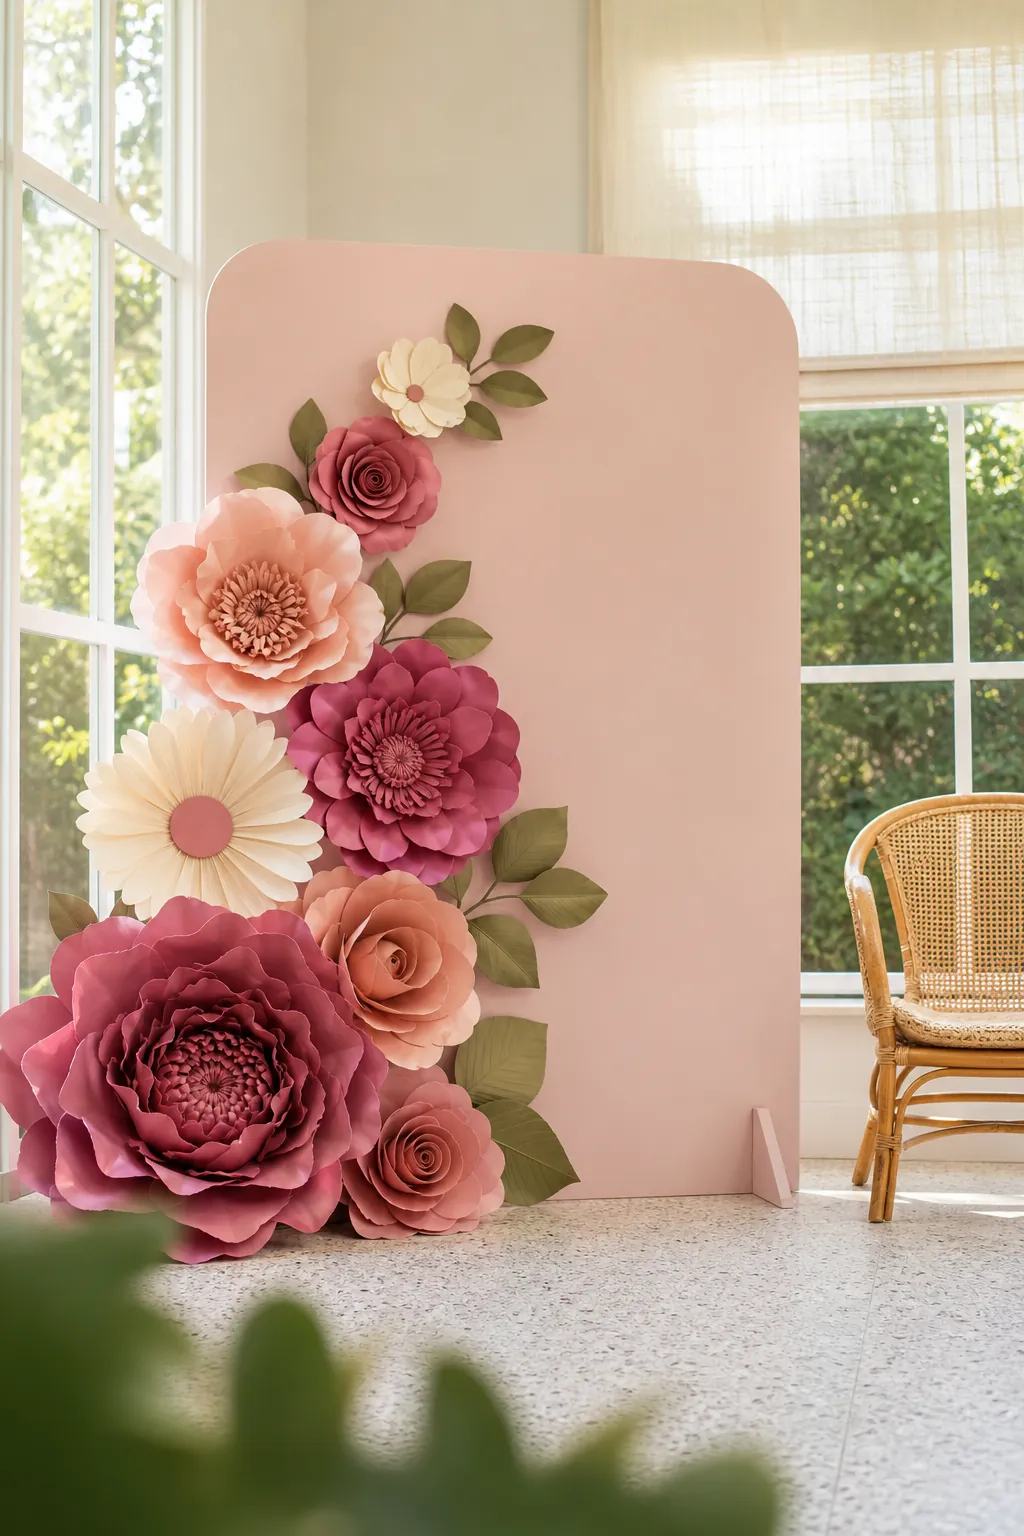
Build dramatic flowers from layered cardstock petals curled around a marker, then add simple green leaves to connect the cluster. Concentrate the blooms in one lower corner and let a few smaller flowers travel upward; the diagonal composition looks lively and leaves space for photographs. Choose matte paper so camera flash does not create glare. For a garden party, fairy theme, or spring birthday, this homemade party backdrop can later move into a playroom or reading nook.
Superhero City Skyline
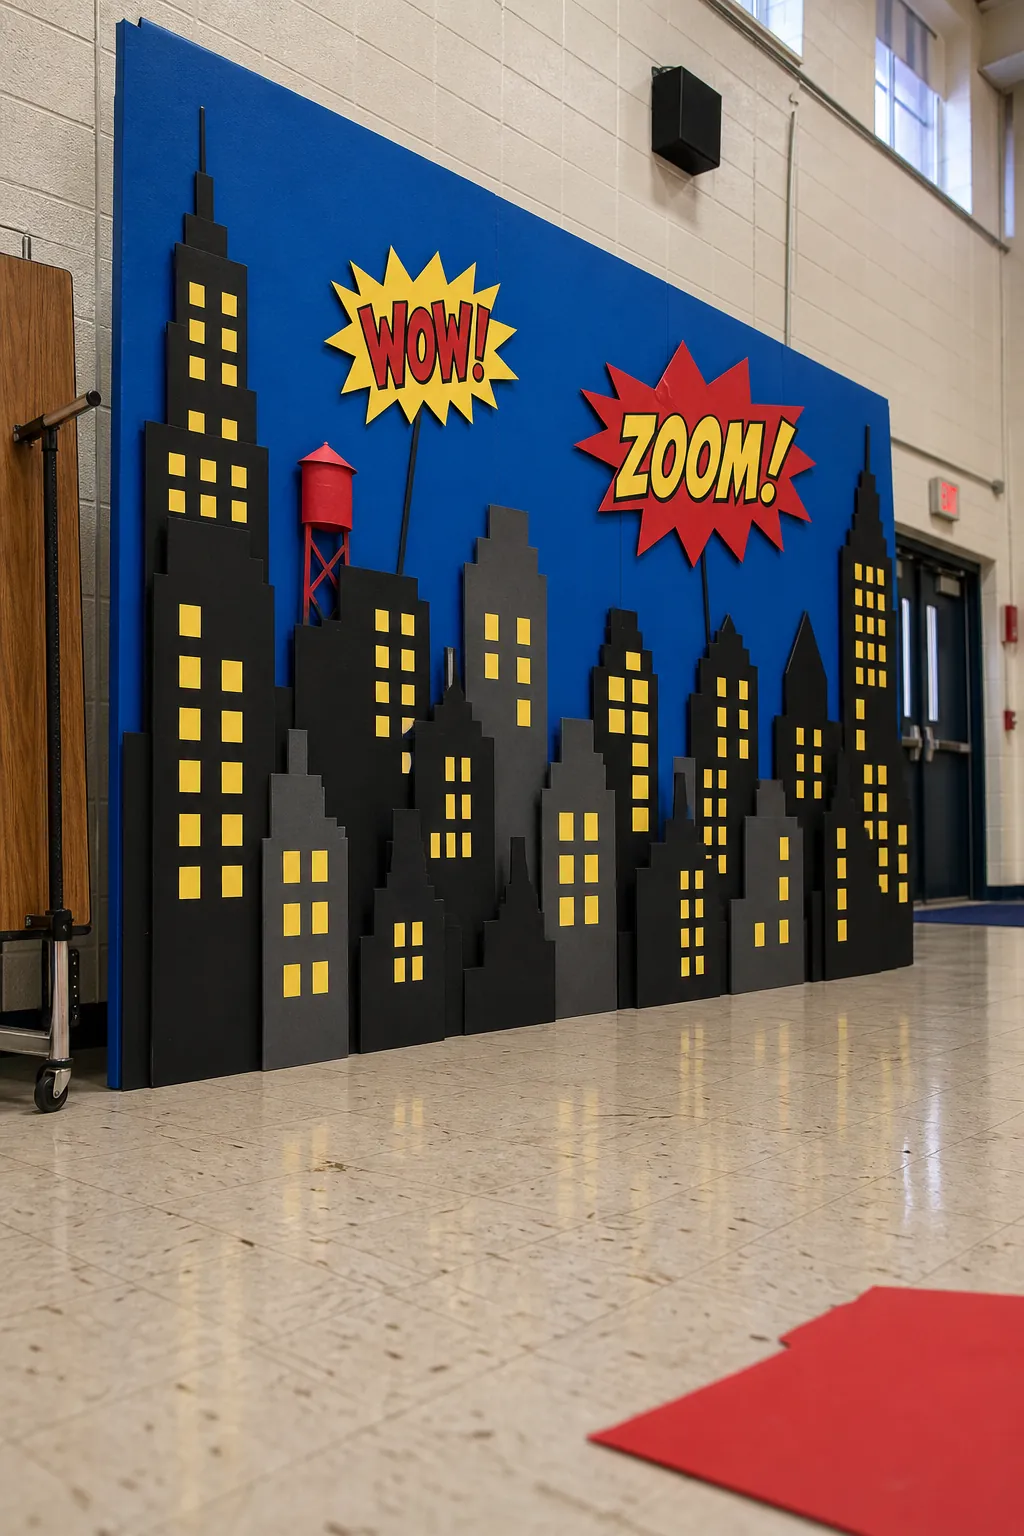
Cut black poster board into varied building silhouettes and back the windows with yellow paper. A low skyline across the bottom third of the wall leaves room for comic-style bursts bearing the child’s name or age. Use original words such as “WOW!” or “ZOOM!” rather than copyrighted character logos. The effect is graphic, inexpensive, and forgiving for non-crafters because crooked rooflines add personality. Position the paper city above chair backs so guests do not crush it during games.
Dinosaur Dig Layered Landscape
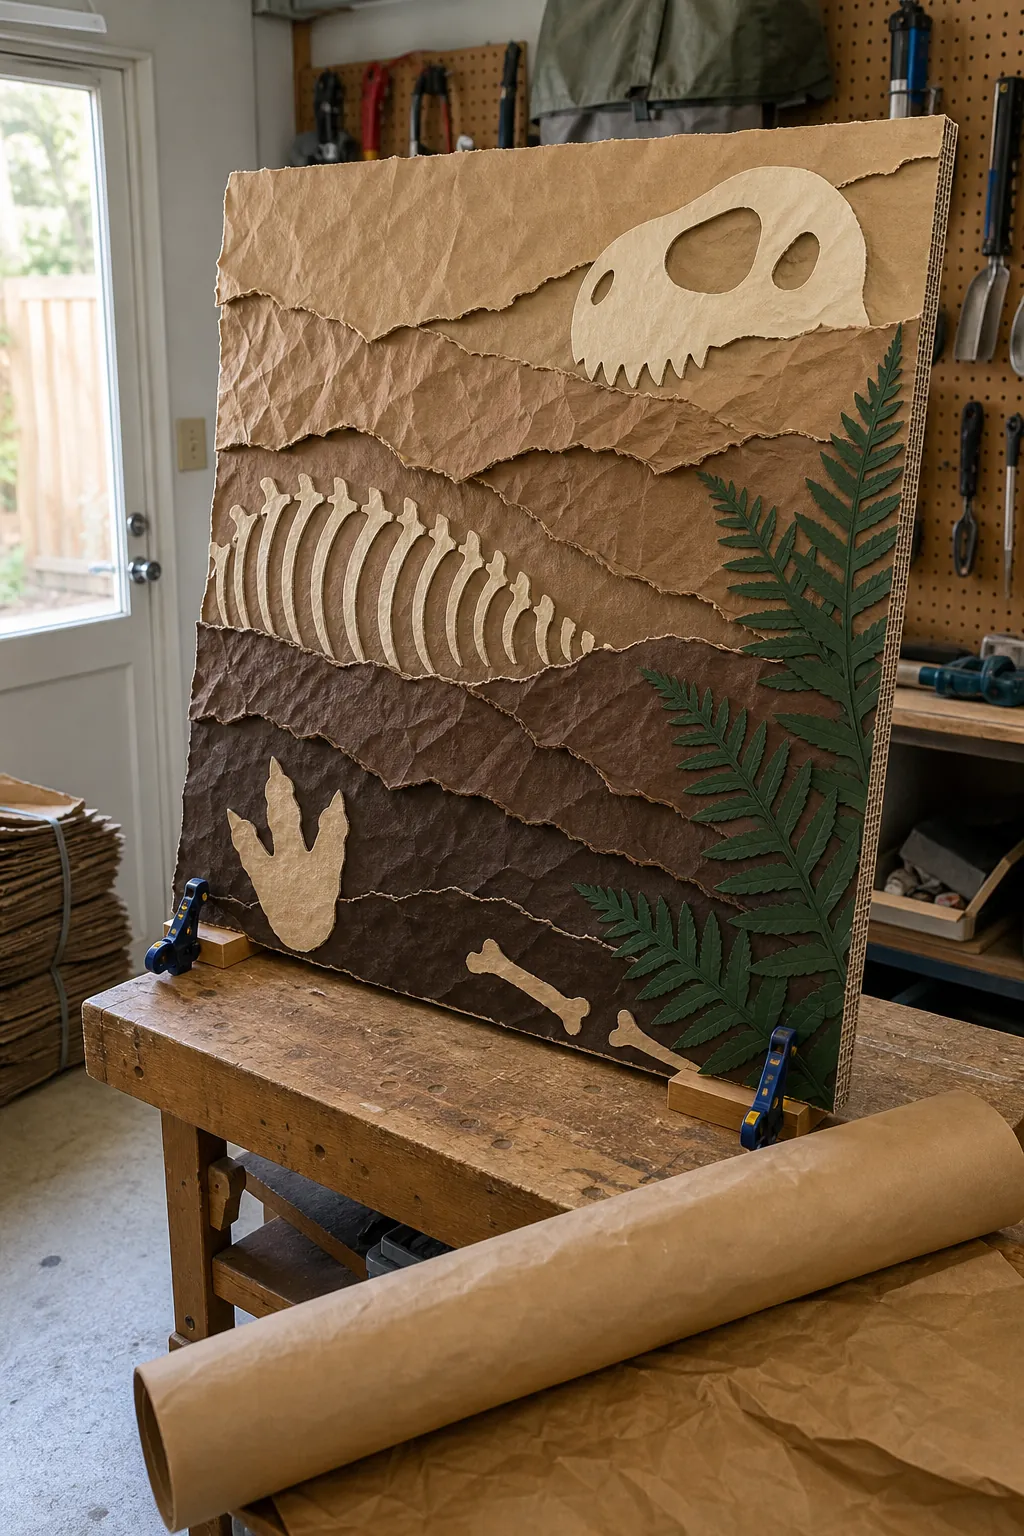
Tear kraft paper into rocky bands, overlap darker brown layers near the bottom, and tuck large white paper “bones” between them. Add leafy cardstock silhouettes around the edges instead of filling the center. The rough torn edges suit an excavation theme and eliminate precise cutting. Place a shallow tray of toy fossils nearby, but keep the wall itself flat and secure. This backdrop works because it suggests an adventure zone rather than trying to reproduce an entire prehistoric scene.
Hanging Paper Planet System
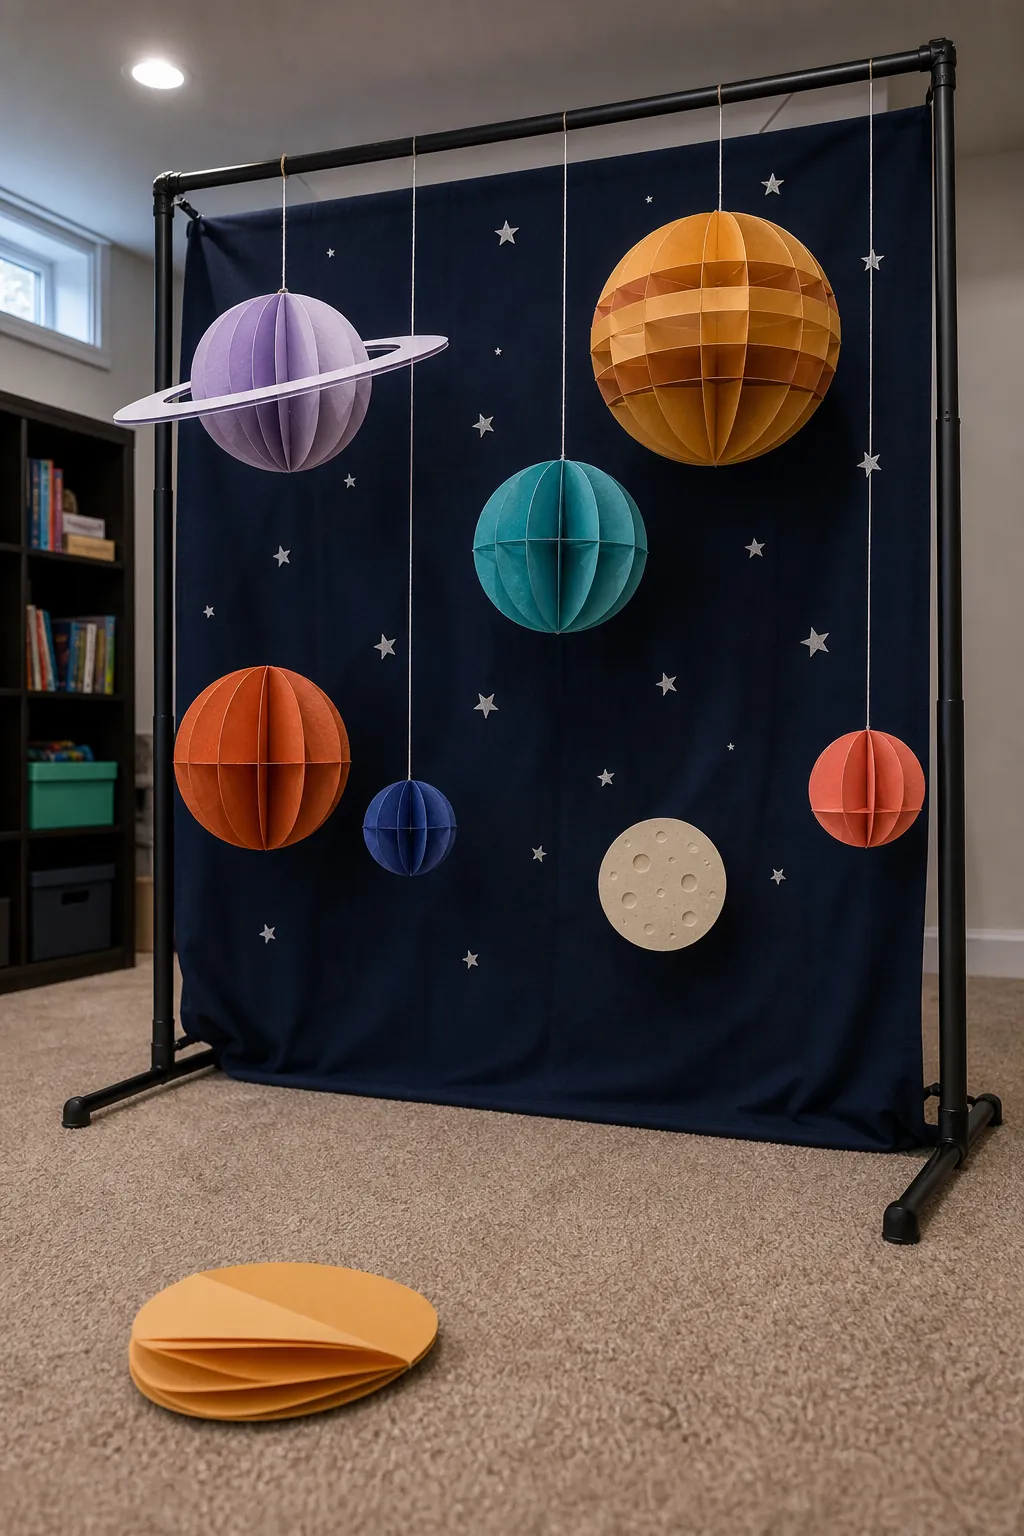
Paint pairs of cardstock circles, fold each in half, and glue several folded pieces together to make lightweight dimensional planets. Suspend them from a portable backdrop frame or secure overhead point—not a sprinkler, light fixture, or unstable ceiling tile. A dark fabric panel behind them creates instant space, while scattered silver paper stars add scale. Keep the planets at varied heights but above faces in the photo area. The pieces collapse flat afterward and can become bedroom decorations.
Floating Jellyfish Ocean Wall
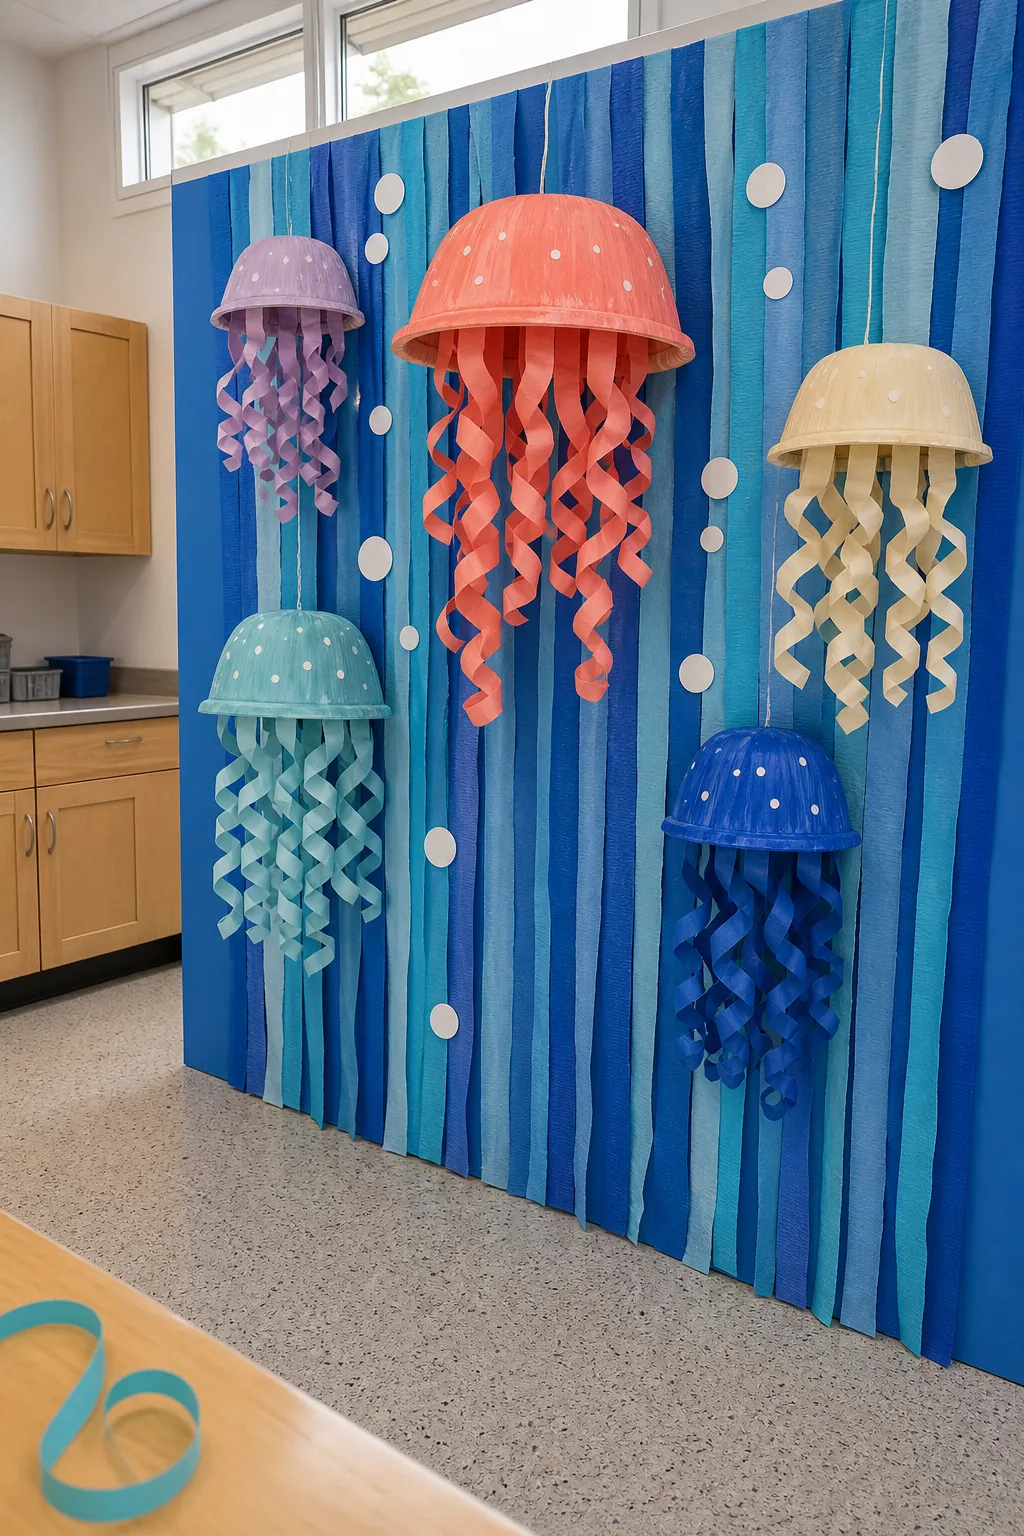
Turn paper bowls into jellyfish by painting the domes and attaching curled ribbon or wide paper tentacles underneath. Hang them against layered blue crepe strips, with the palest blue at the top and deepest tone near the floor. Give every tentacle enough clearance that it cannot wrap around a child’s neck or catch on a chair. A few cut-paper bubbles provide detail without clutter. This undersea wall feels immersive even when it covers only the width of a small dessert table.
Woodland Animal Peekaboo Panels
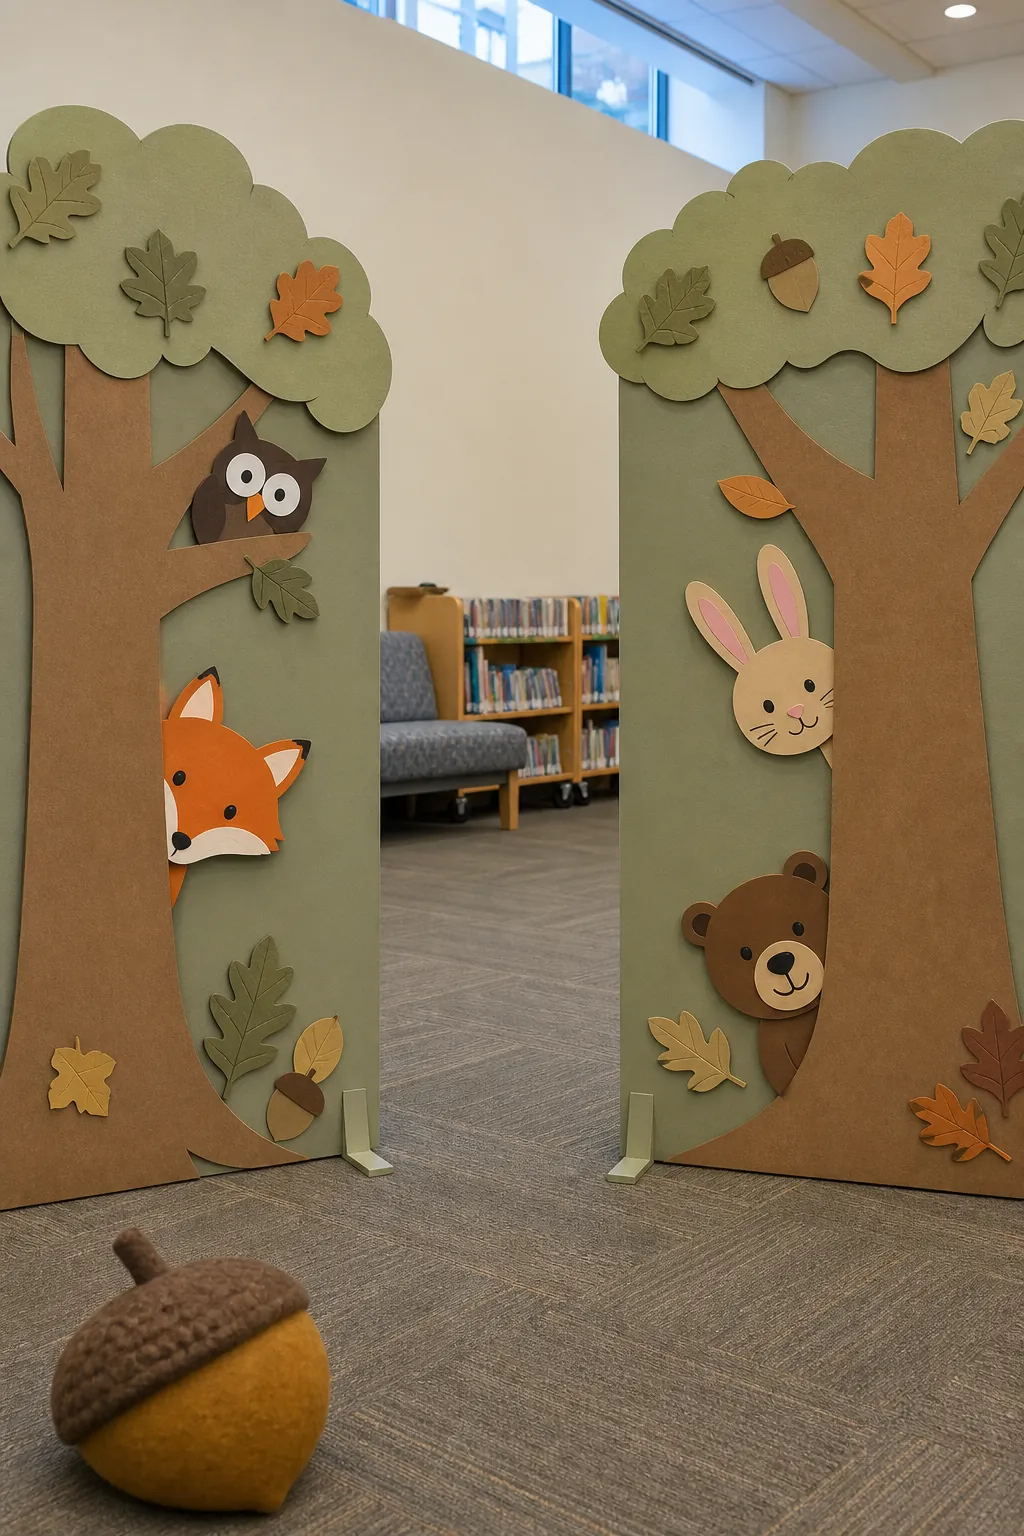
Cut simple tree trunks and leafy canopies from kraft paper, then place friendly fox, owl, rabbit, and bear faces so they appear to peek around the edges. Large shapes are easier to recognize and faster to make than detailed illustrations. Keep facial features high-contrast and cheerful for younger guests. Mount the scene on two paper panels that can be carried separately. Muted forest colors also make bright party outfits stand out, which improves family photos without requiring elaborate props.
Construction Zone Tape Design
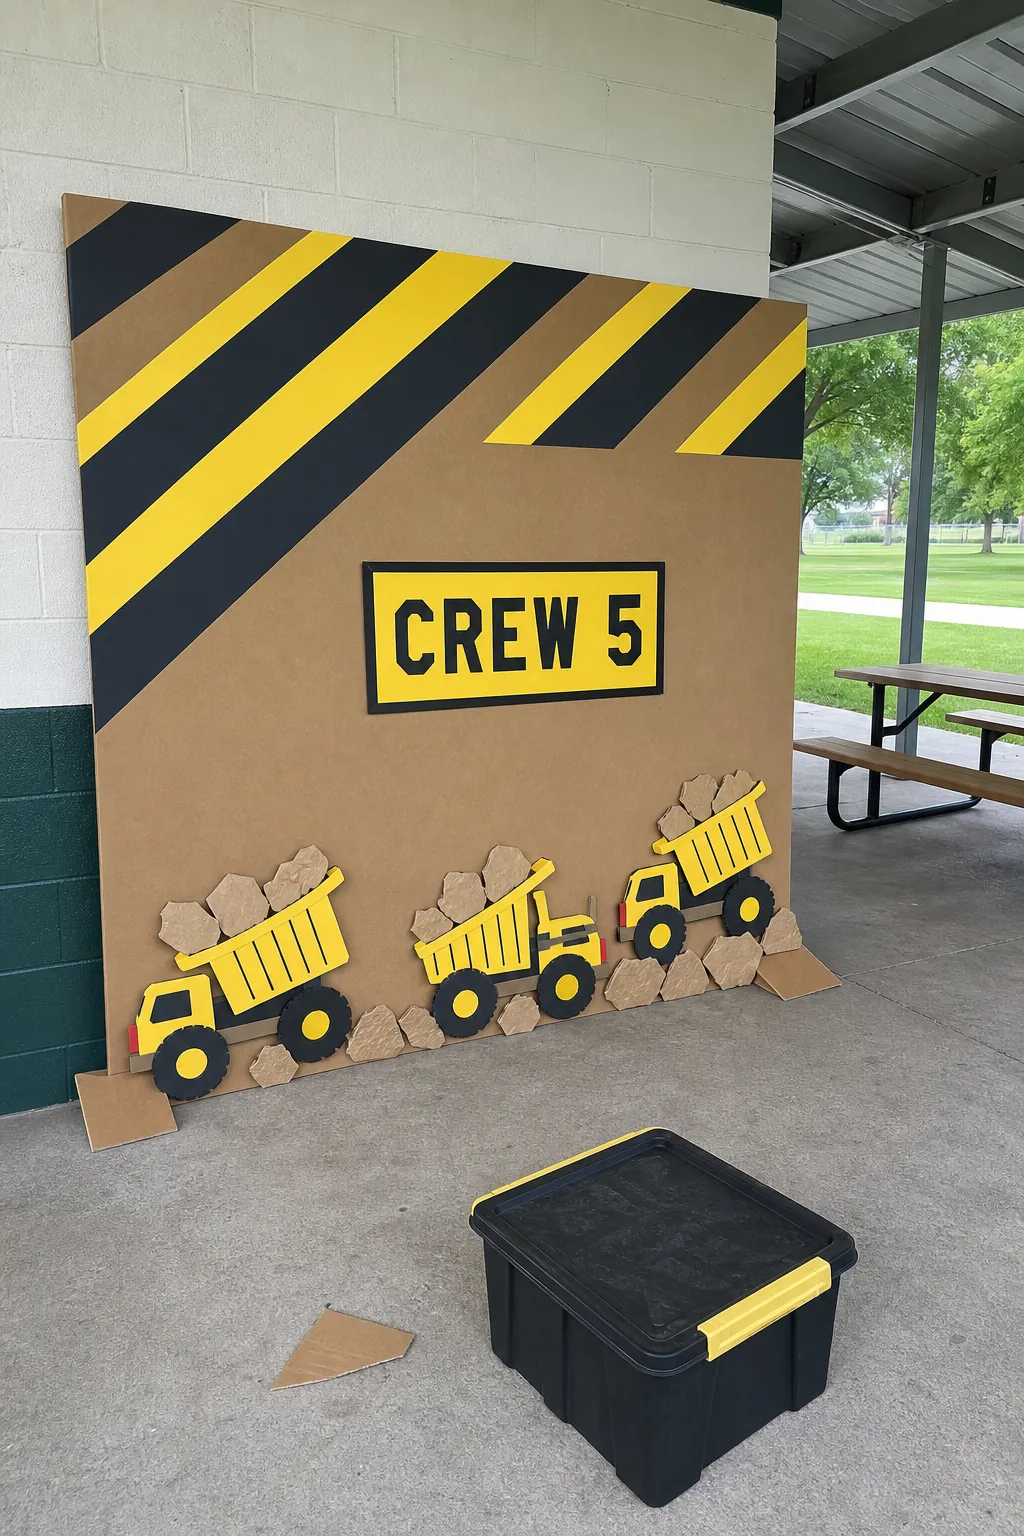
Create diagonal hazard stripes on a removable paper backing, then add cardboard dump trucks carrying paper “rocks” across the bottom. An oversized sign with the child’s age—“Crew 5,” for example—becomes the focal point. Do not stretch real plastic caution tape where children run; it can become a trip or entanglement hazard. Repeating black, yellow, and kraft brown produces a strong theme with only a few supplies, making it useful for last-minute kids party decorations.
Birthday Child Mini Art Gallery
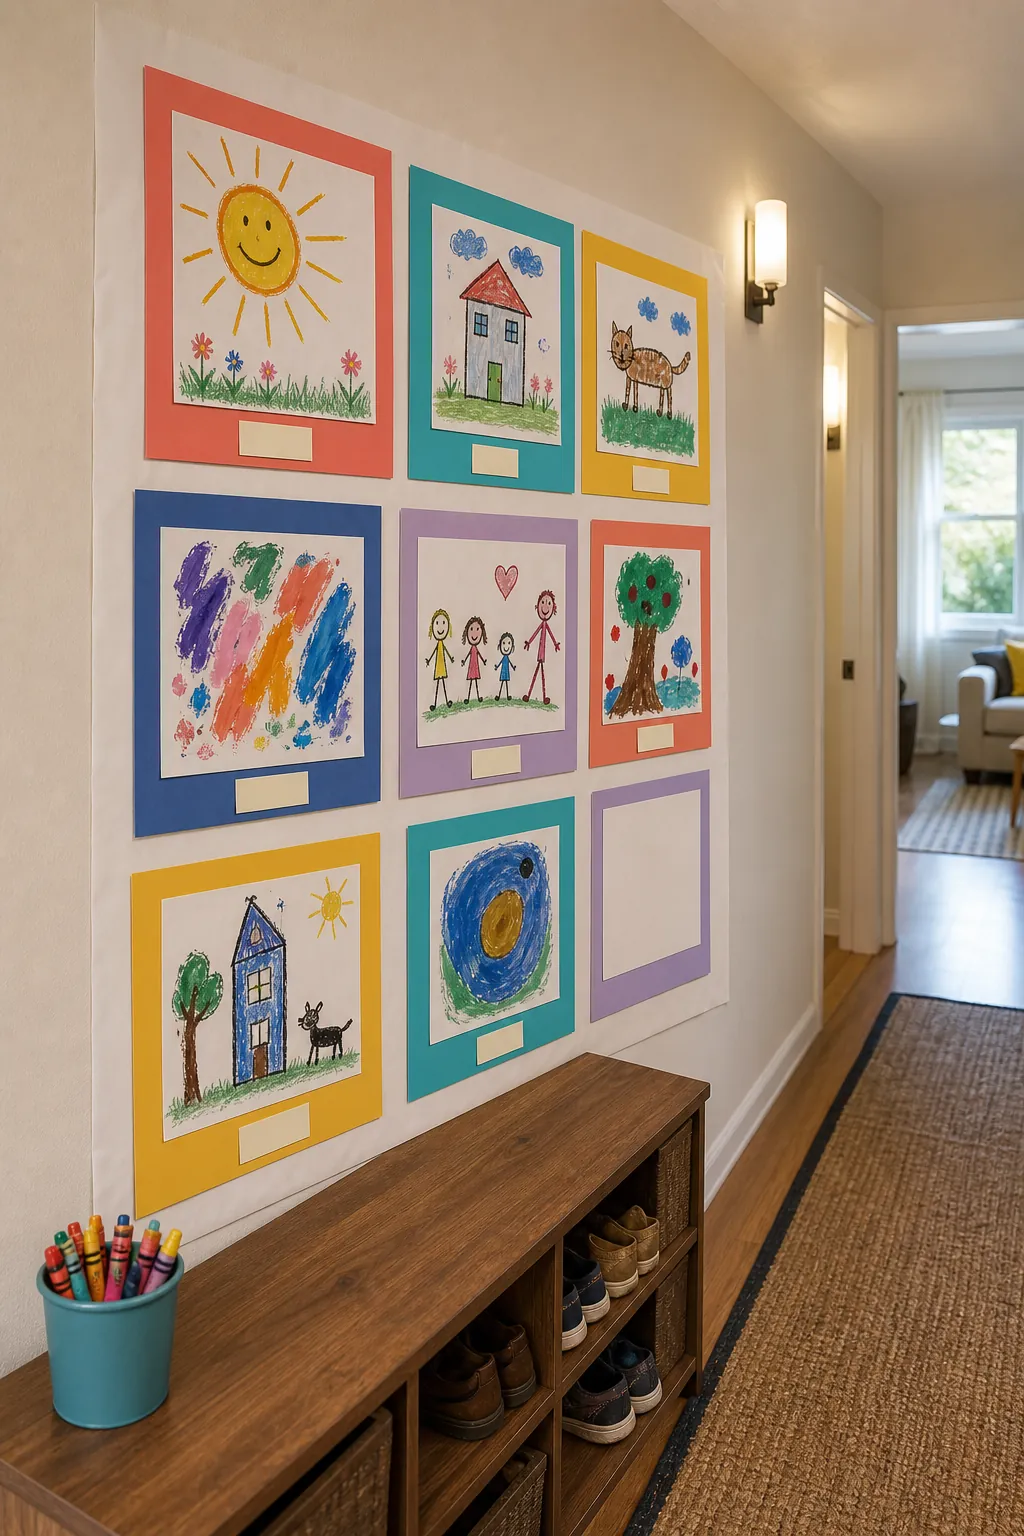
Photocopy favorite drawings, mount them on bright cardstock mats, and display the copies in a neat grid using painter-safe methods. A paper label beneath each piece can include its title and the artist’s age, turning ordinary family artwork into a proud feature. Copies prevent accidental damage from frosting or little hands. Leave one blank frame with crayons on a nearby table so guests can contribute a new picture, then bind the finished drawings into a birthday keepsake.
Growing-Up Photo Timeline
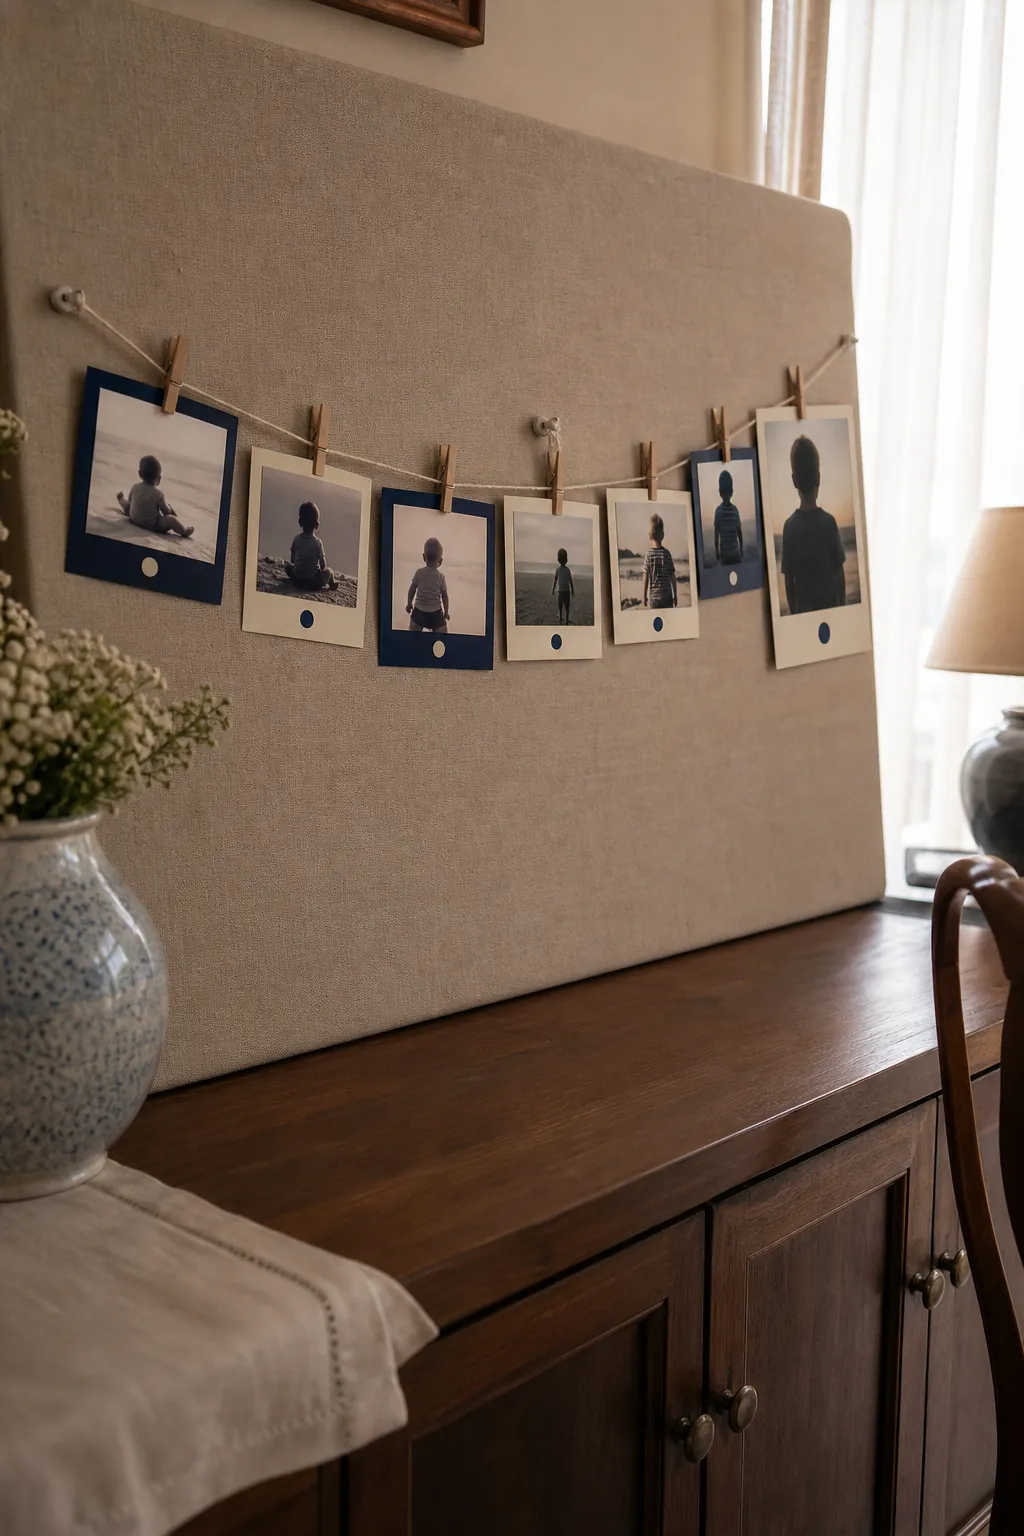
Print inexpensive copies of one photo from each year or month, clip them to a cord, and place a small paper label beneath each image. Secure the cord at several points so it cannot sag into reach, and use copies rather than irreplaceable originals. The linear layout naturally guides grandparents and friends through the child’s story. To make it feel like party décor rather than a family noticeboard, repeat one frame color and finish the timeline with a larger current portrait.
Interactive Chalkboard Doodle Wall
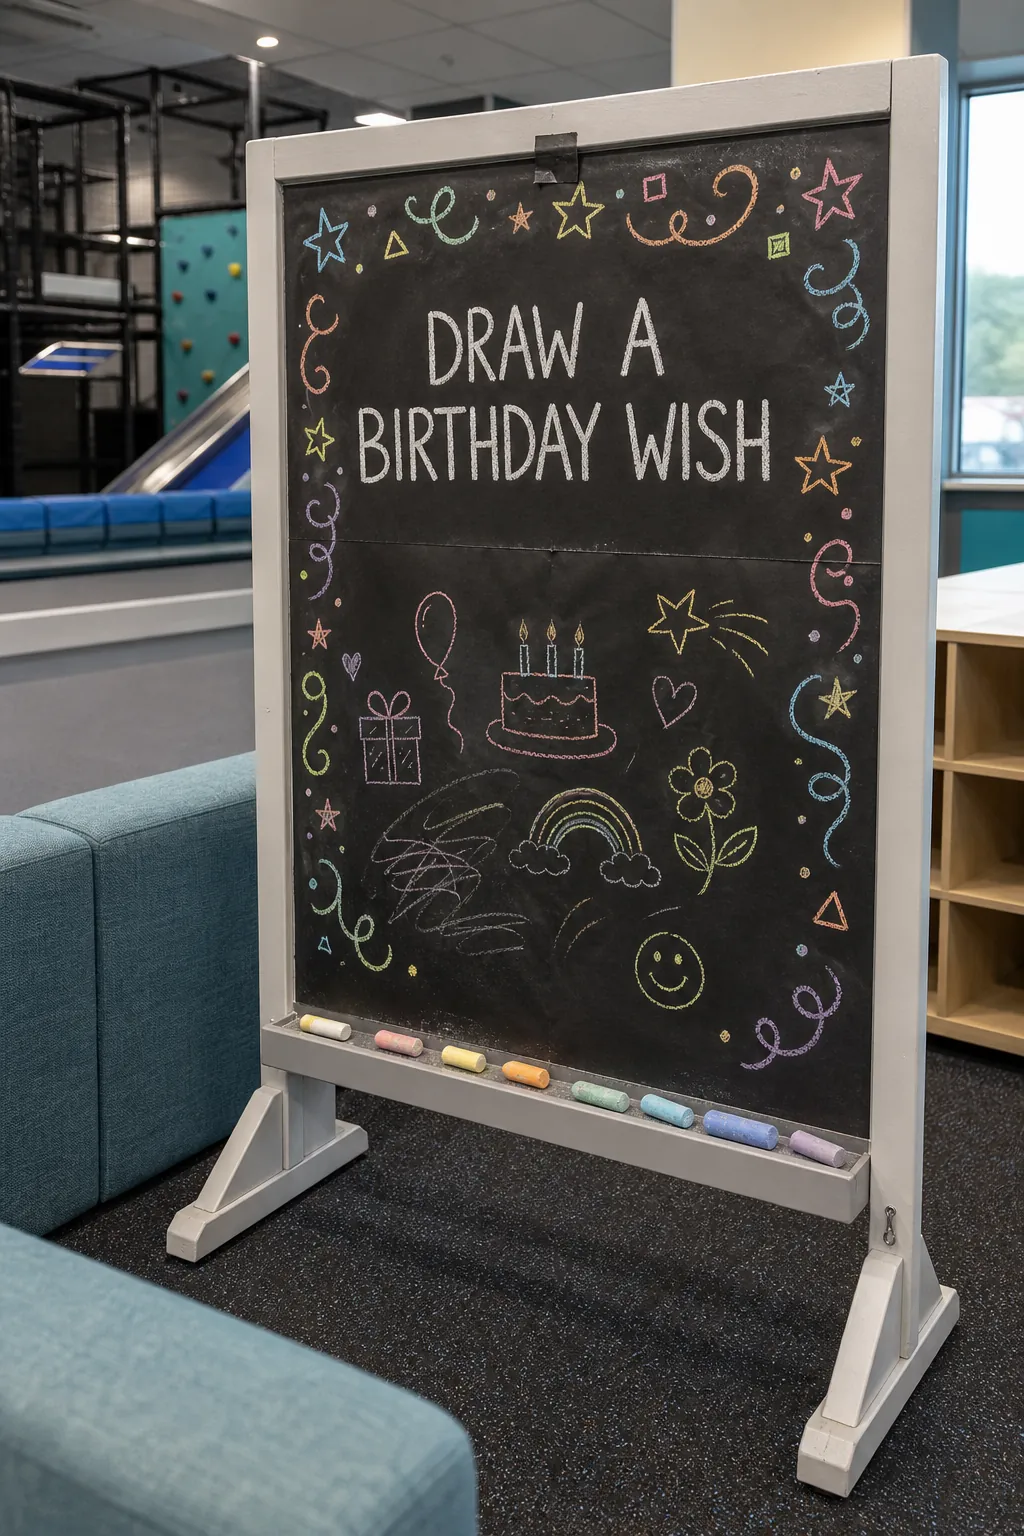
Cover a freestanding board with matte black paper and draw a bright border plus a prompt such as “Draw a birthday wish.” Use washable chalk markers only if the surface manufacturer approves them; ordinary chalk is the safer low-tech choice. Set the drawing zone at child height and keep a finished decorative header above it. This wall earns its footprint by doubling as a calm activity for guests who need a break from noise, games, or a crowded room.
Color-Blocked Ribbon Curtain
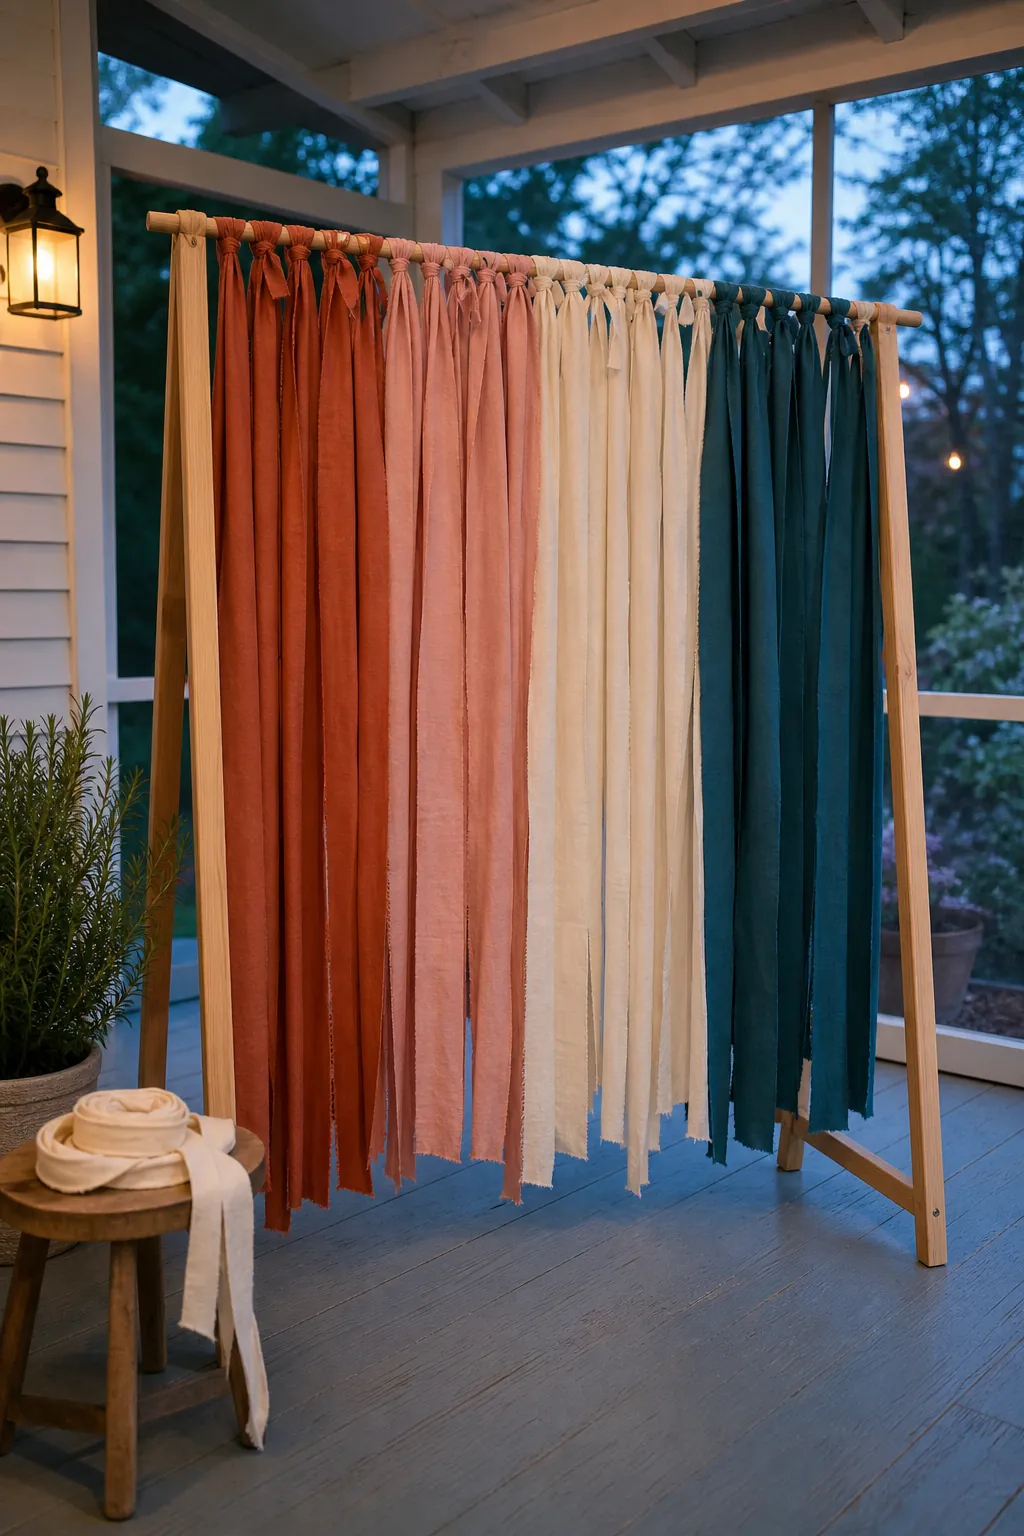
Tie strips of fabric, wide ribbon, or clean torn sheets to a tension rod or portable frame. Arrange colors in broad blocks instead of alternating every strip; the result appears calmer and more intentional. Cut all ends above the floor to prevent trips, and avoid narrow loops where hands could catch. Unlike crepe paper, this backdrop survives breeze, transport, and repeated birthdays. It is especially practical for families who want reusable children birthday ideas instead of disposable decorations.
Cupcake Liner Confetti Mosaic
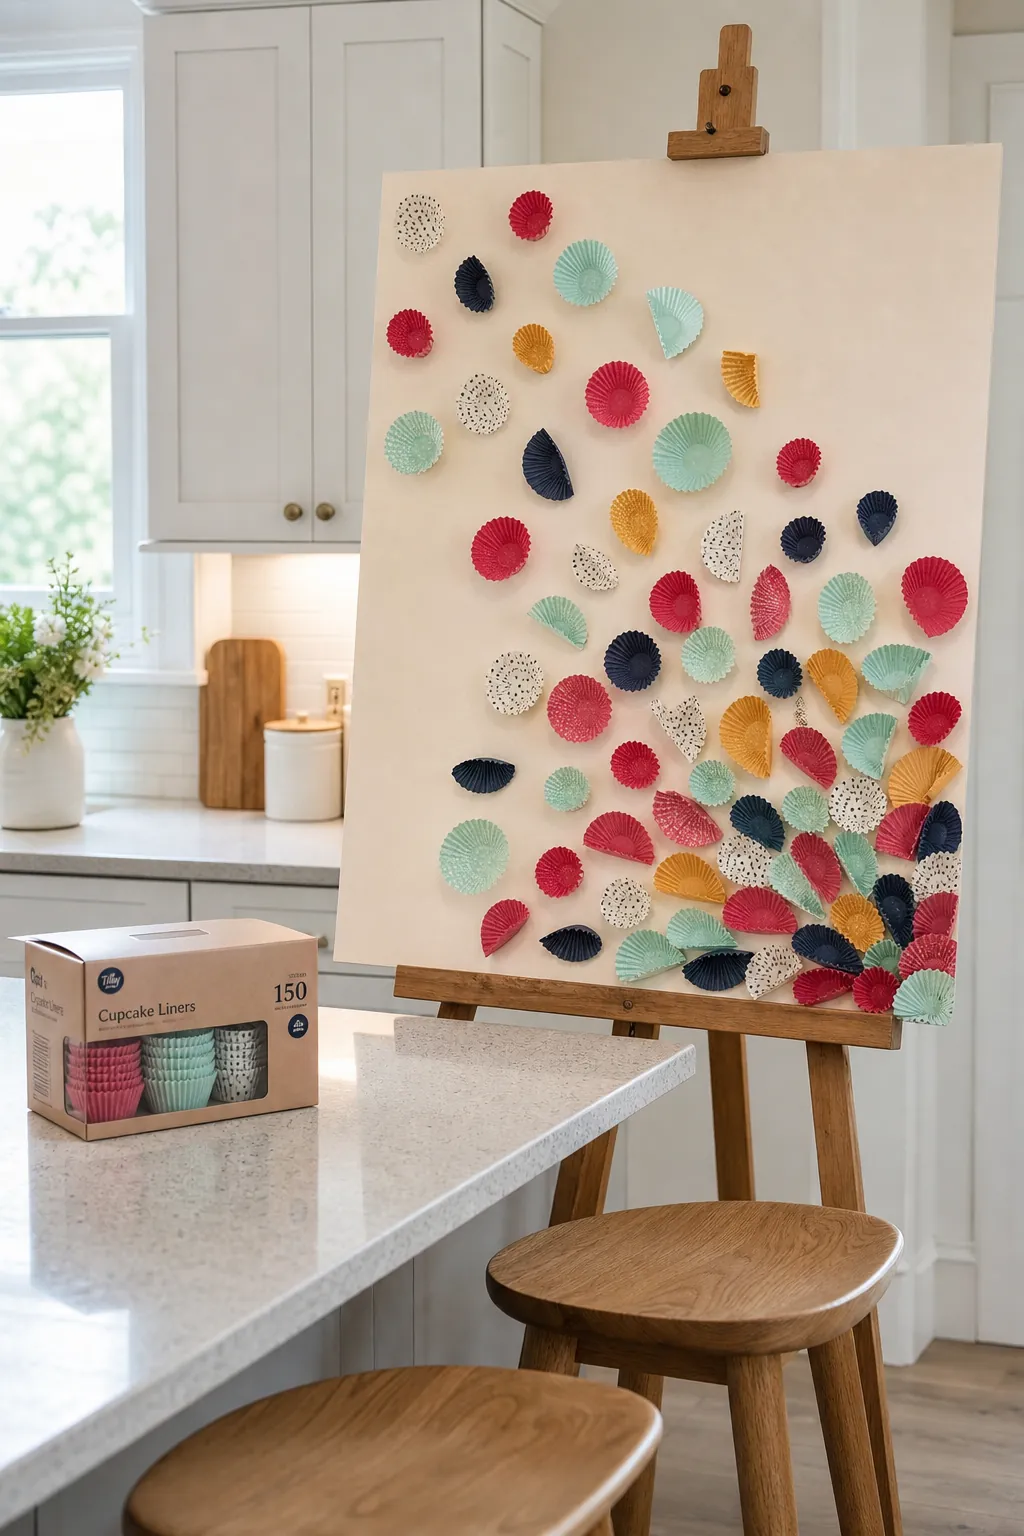
Flatten some cupcake liners and leave others cupped, then arrange them in a loose burst radiating from one corner of a paper backing. Their pleated edges create texture without complicated cutting. Mix solid liners with a small number of patterns and keep the center of the photo area relatively open. This idea is useful when a matching pack is left over from the dessert table. Use fresh liners for décor and reserve food-contact supplies separately so craft glue never reaches serving pieces.
Flight of Origami Butterflies
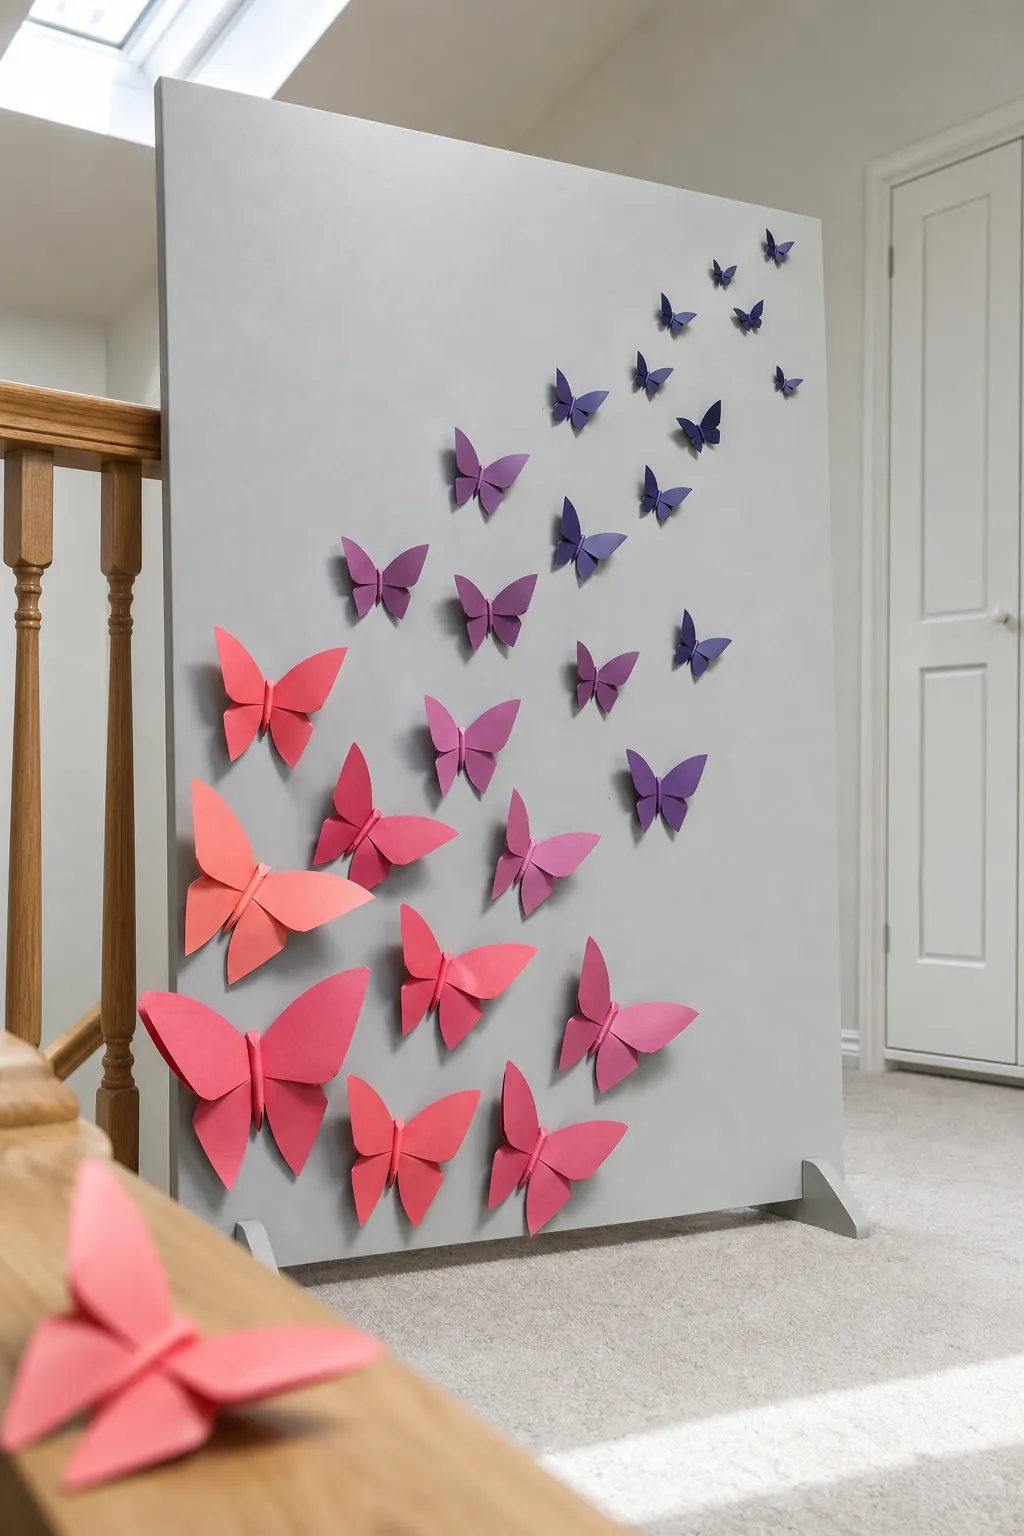
Fold butterflies from square paper in three sizes and arrange them in a sweeping path from low and dense to high and sparse. Bend the wings gently so side light creates real shadows. A controlled gradient—coral into pink, or teal into blue—looks sophisticated while remaining playful. Attach the butterflies to a removable paper panel if the wall finish is uncertain. Afterward, thread the best pieces into a mobile or let guests take one home with their favor bag.
Glow-Star Night Sky
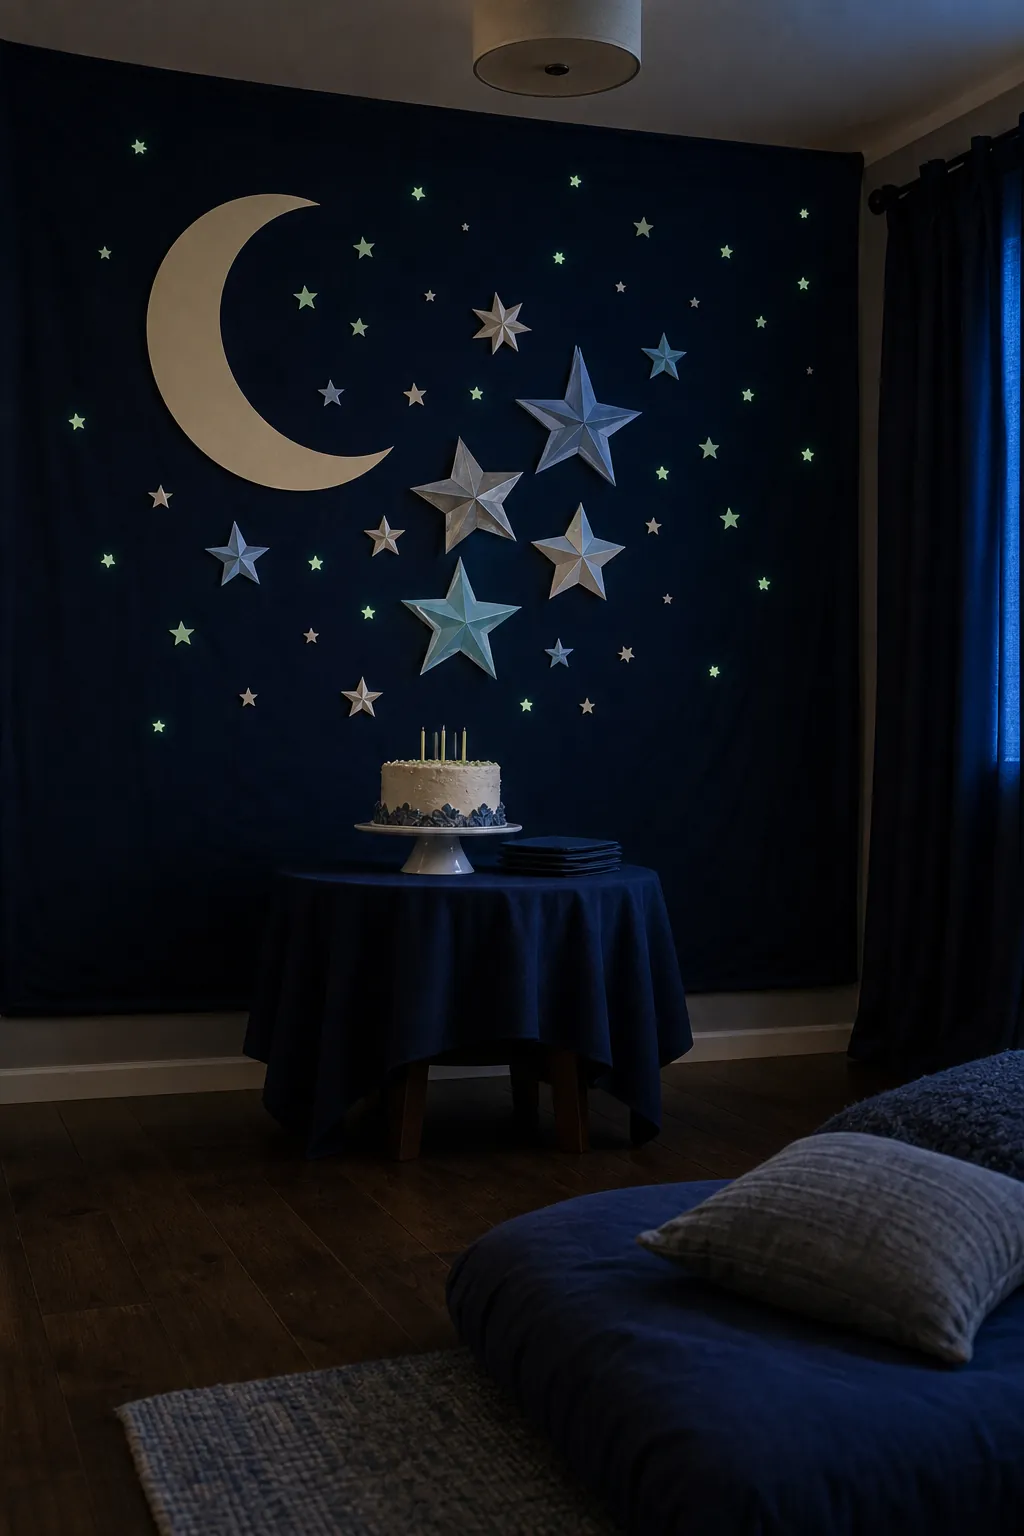
Use navy fabric or paper as the base, then add large card stars, a crescent moon, and a few child-safe glow shapes. Keep the constellation loose rather than perfectly symmetrical, and put the brightest cluster behind the cake table. Charge glow pieces under light before guests arrive, but do not depend on darkness for the wall to work; pale paper stars should still read in normal photographs. Check labels and keep small adhesive shapes away from children who still mouth objects.
Reusable Fabric Bunting Memory Wall
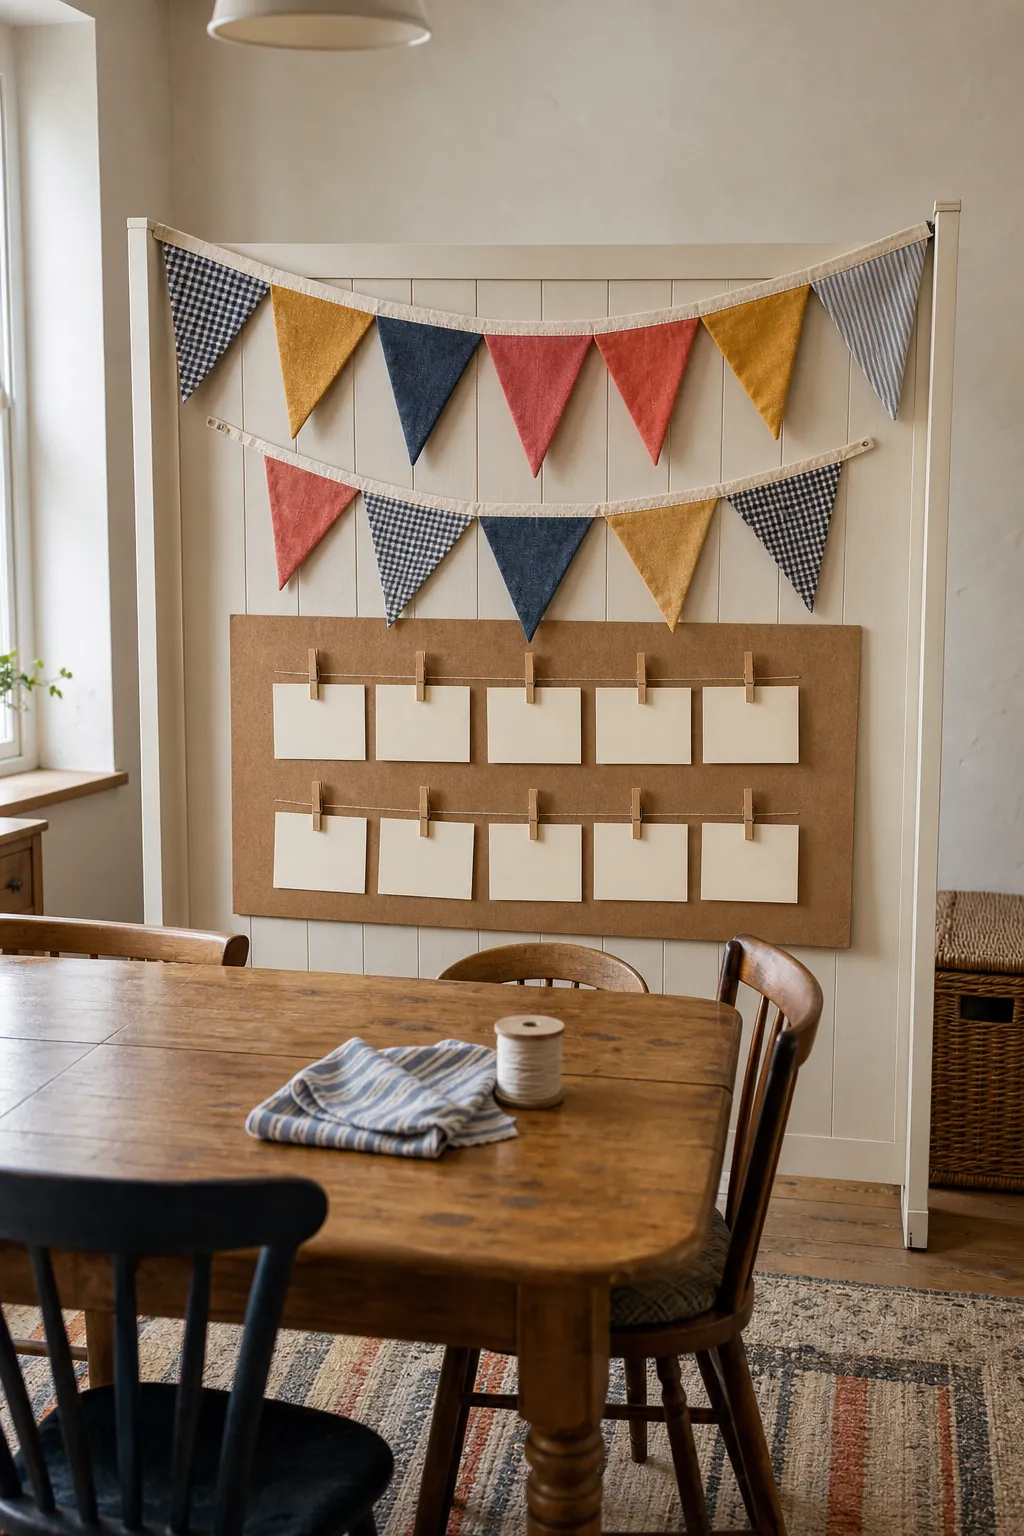
Sew or glue double-sided fabric triangles over cotton tape, leaving generous ties at both ends, then hang two relaxed rows above a small board for birthday notes. Choose washable scraps that already share a color family; perfect matching is unnecessary. Each year, add one new flag made from a meaningful outgrown shirt or favorite fabric. The strongest party wall is not the one that took the longest—it is the one that helps everyone slow down, gather for a photo, and remember whose day they came to celebrate.