
A tiny paper bag can look polished until the handles pull through its top edge or the bottom opens. The useful details are not extra decoration. They are a reinforcement band, complete gussets, and bottom flaps that close in a stable order.
Open the full size printable, save it, and print at actual size or 100 percent. Turn off page fitting. Test one net on ordinary paper before using your final sheet.
Print the three complete bag nets
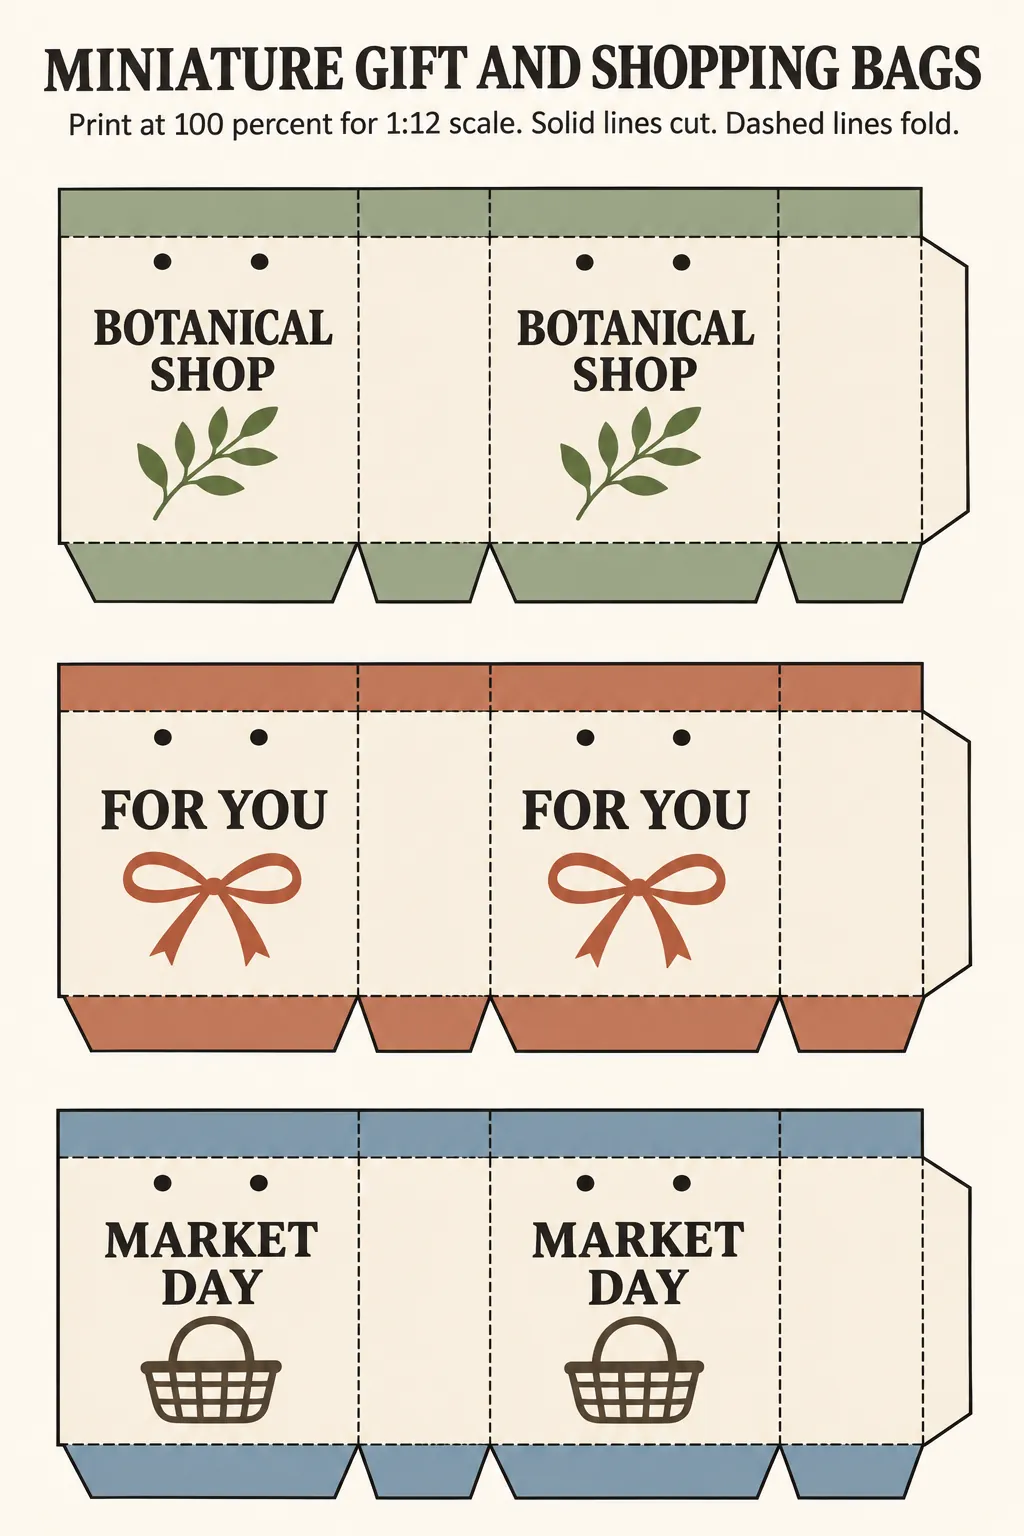
Download high-resolution printable
Score every dashed line before cutting. Fold the top reinforcement band inward first, then form the side seam and gussets. Close the bottom with the short flaps first and the larger flaps last.
Make handles that stay attached
Pierce handle marks only after the reinforcement band is glued and dry. Thread thin cotton cord through each pair and secure short tails inside with a small paper patch. Do not rely on a knot alone because it concentrates pressure at one tiny point.
Shape the bag without crushing it
Open the gussets with blunt tweezers and press the bottom flat from inside with a narrow tool. Add a small tissue insert if you want the bag to hold its form. Let all seams dry before placing a parcel inside or lifting the bag by its handles.