Nursery Wall Stickers: Beautiful, Removable Baby Room Ideas
Nursery wall stickers work best when they are treated as a flexible design system, not an afterthought. Parents often choose them because a full mural or wallpapered nursery feature wall can feel too permanent, too expensive, or too risky for fresh paint. The better approach is simpler: choose one calm visual story, test the wall first, and use decals where they can make the room feel finished without locking you into a theme your child may outgrow quickly.
The most useful nursery wall decals solve three problems at once. They add personality to a baby room wall design, they are easier to refresh than paint or paste wallpaper, and they can soften a plain room without filling every surface. The goal is not to cover the nursery in stickers. The goal is to create one intentional place for the eye to land.
Start With the Wall, Not the Sticker Sheet
Before choosing a theme, look at the surface. Peel-and-stick products are most reliable on smooth, clean, fully cured paint. Textured walls, dusty paint, humid rooms, and freshly painted surfaces are where many nursery wall sticker projects fail. If the paint is new, give it time to cure according to the paint and decal maker’s instructions before applying anything adhesive.
Do a small test in a low-visibility spot and leave it for several days. Then peel it slowly and check for lifting paint, residue, or edge curling. This small step matters more than the brand name. A beautiful decal on the wrong wall can become a peeling problem; a modest decal on the right wall can look polished for years.
- Use decals on smooth drywall, painted plaster, or sealed wood panels when the surface is clean and stable.
- Avoid damaged, bubbling, chalky, or heavily textured paint.
- Keep small removable pieces away from crib rails, changing areas, and any place a child can reach as they grow.
- Save the backing sheet if the decals are repositionable and you may reuse them later.
Use One Feature Wall Instead of Decorating Every Wall
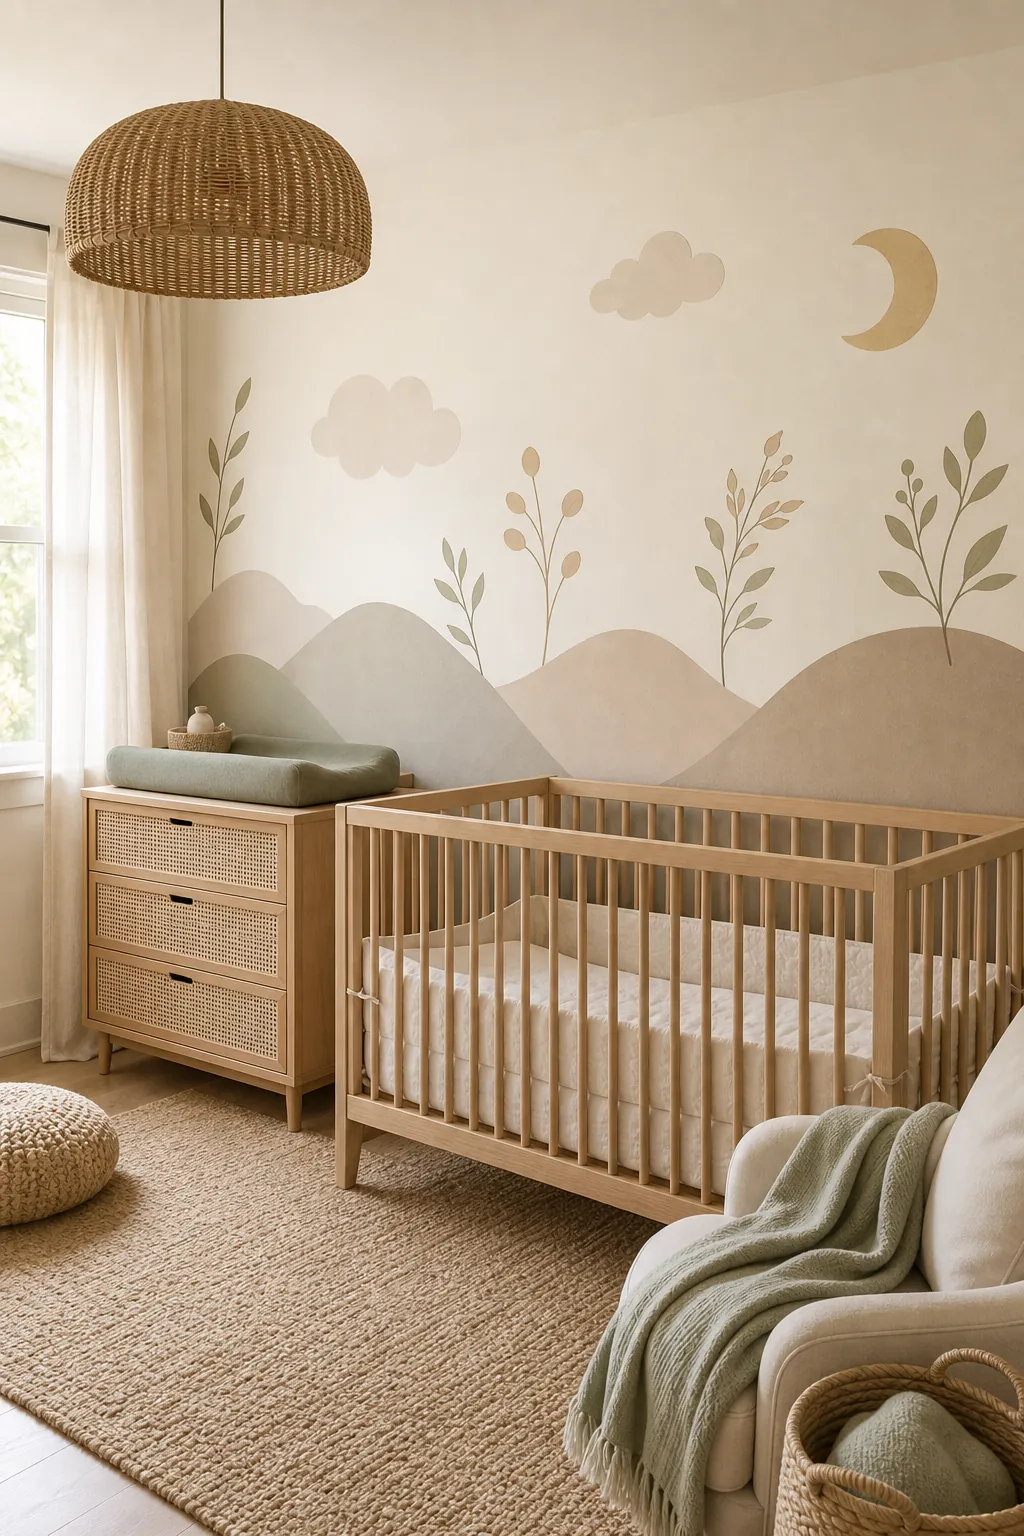
A nursery feature wall gives stickers enough presence to feel designed. The wall behind the crib is the classic choice, but a reading corner, dresser wall, or changing nook can work better if the crib wall already has windows, shelves, or awkward trim. Keep the surrounding walls quieter so the decals feel like part of the room rather than visual clutter.
This is where nursery wall stickers can replace heavier nursery mural ideas. A cluster of large-scale decals can give the softness of nursery wall murals without the cost, paste, or long-term commitment. For renters or parents who know the room will change, decals make it easier to build a finished baby room without committing to a full baby room wall painting project.
Choose a Palette the Room Can Grow Into
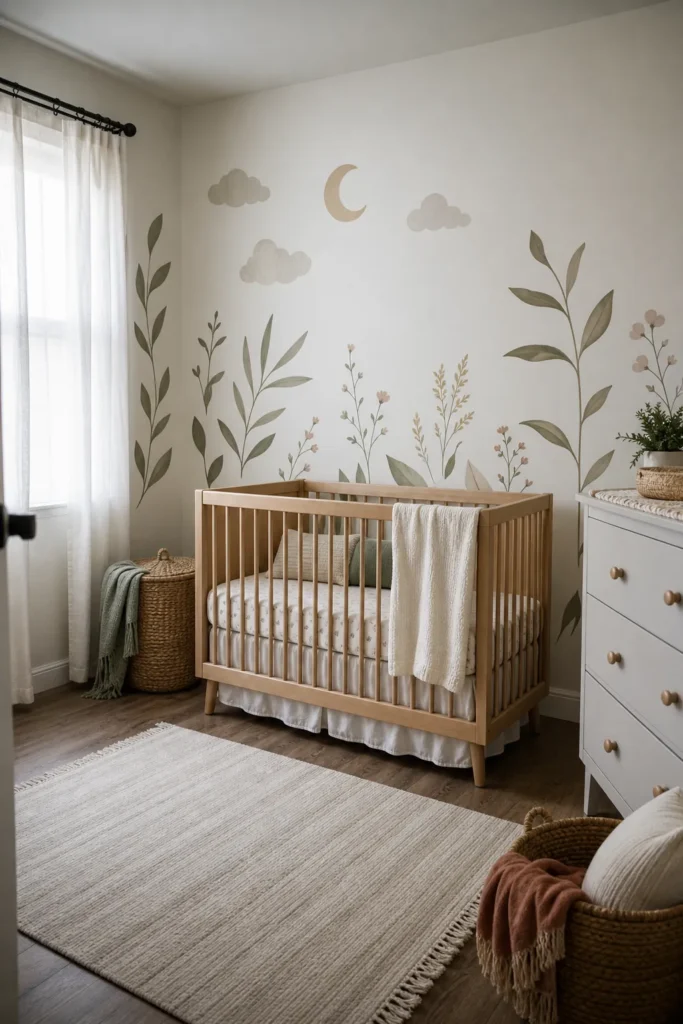
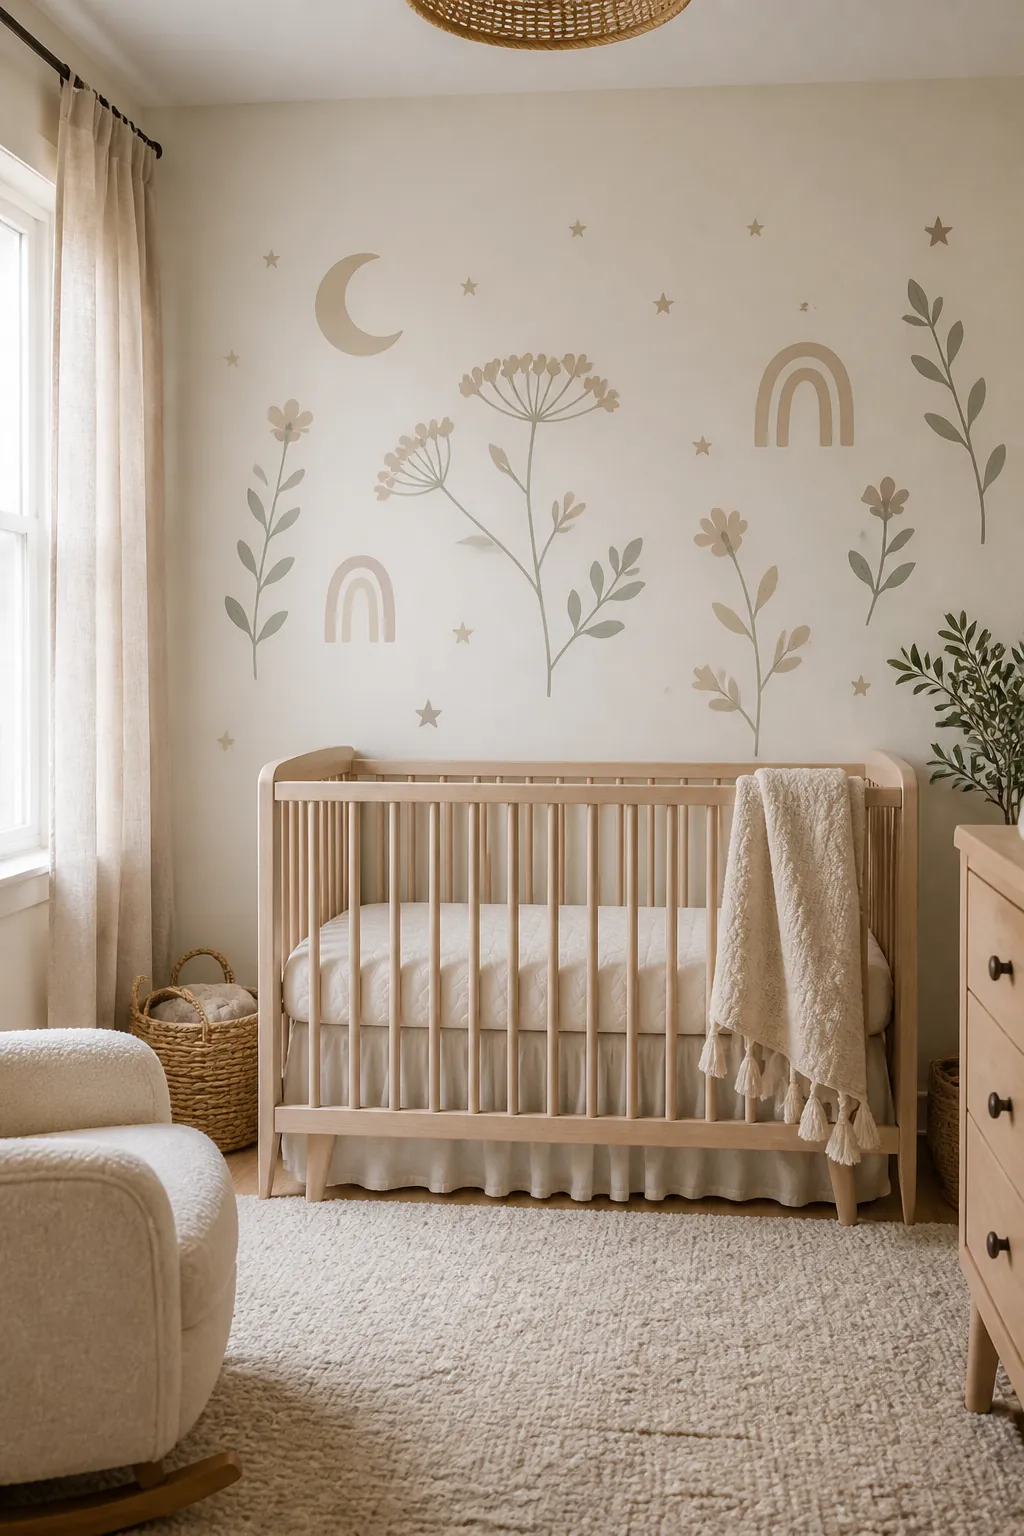
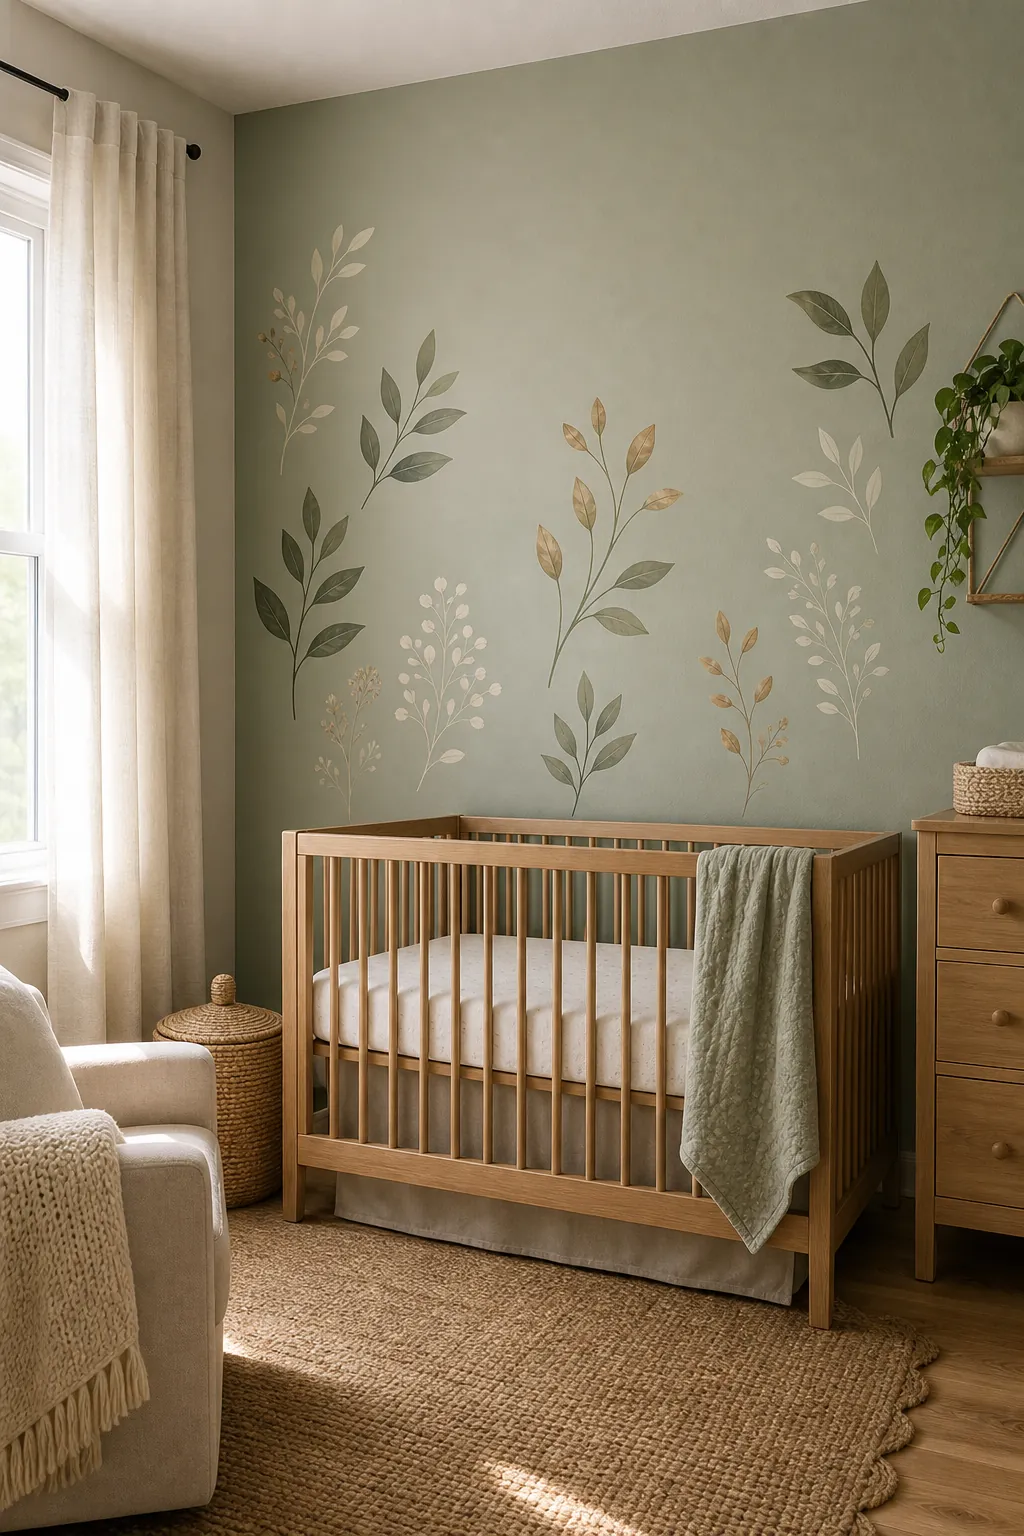
Nursery themes age faster when the colors are too bright or the design is too literal. Neutral nursery ideas are popular because they leave space for bedding, books, toys, and changing tastes. Warm white, oatmeal, clay, sage, olive, dusty blue, and soft gray all work well because they make the wall stickers feel integrated rather than pasted on.
A green nursery is especially forgiving. Leafy decals, meadow shapes, soft branches, or watercolor-style botanicals can make the room feel restful without being locked to a narrow theme. If you are torn between two sticker sets, choose the one that works with the rug, curtains, and dresser you already own. That is usually what makes the room look expensive.
Let Scale Do the Work
Tiny decals scattered evenly across a wall can look busy from a doorway. Larger pieces, spaced with more breathing room, tend to look calmer and more custom. Place the biggest shape slightly off center, then build around it with smaller pieces. This makes the layout feel closer to a mural and less like a sticker sheet was applied straight from the package.
For a polished baby room wall design, check the layout from the doorway, from the crib side, and from standing height near the dresser. The view from the doorway is often the most important. That is the angle guests, photos, and everyday parents see first. If the wall looks balanced from the doorway, it will usually feel balanced in the room.

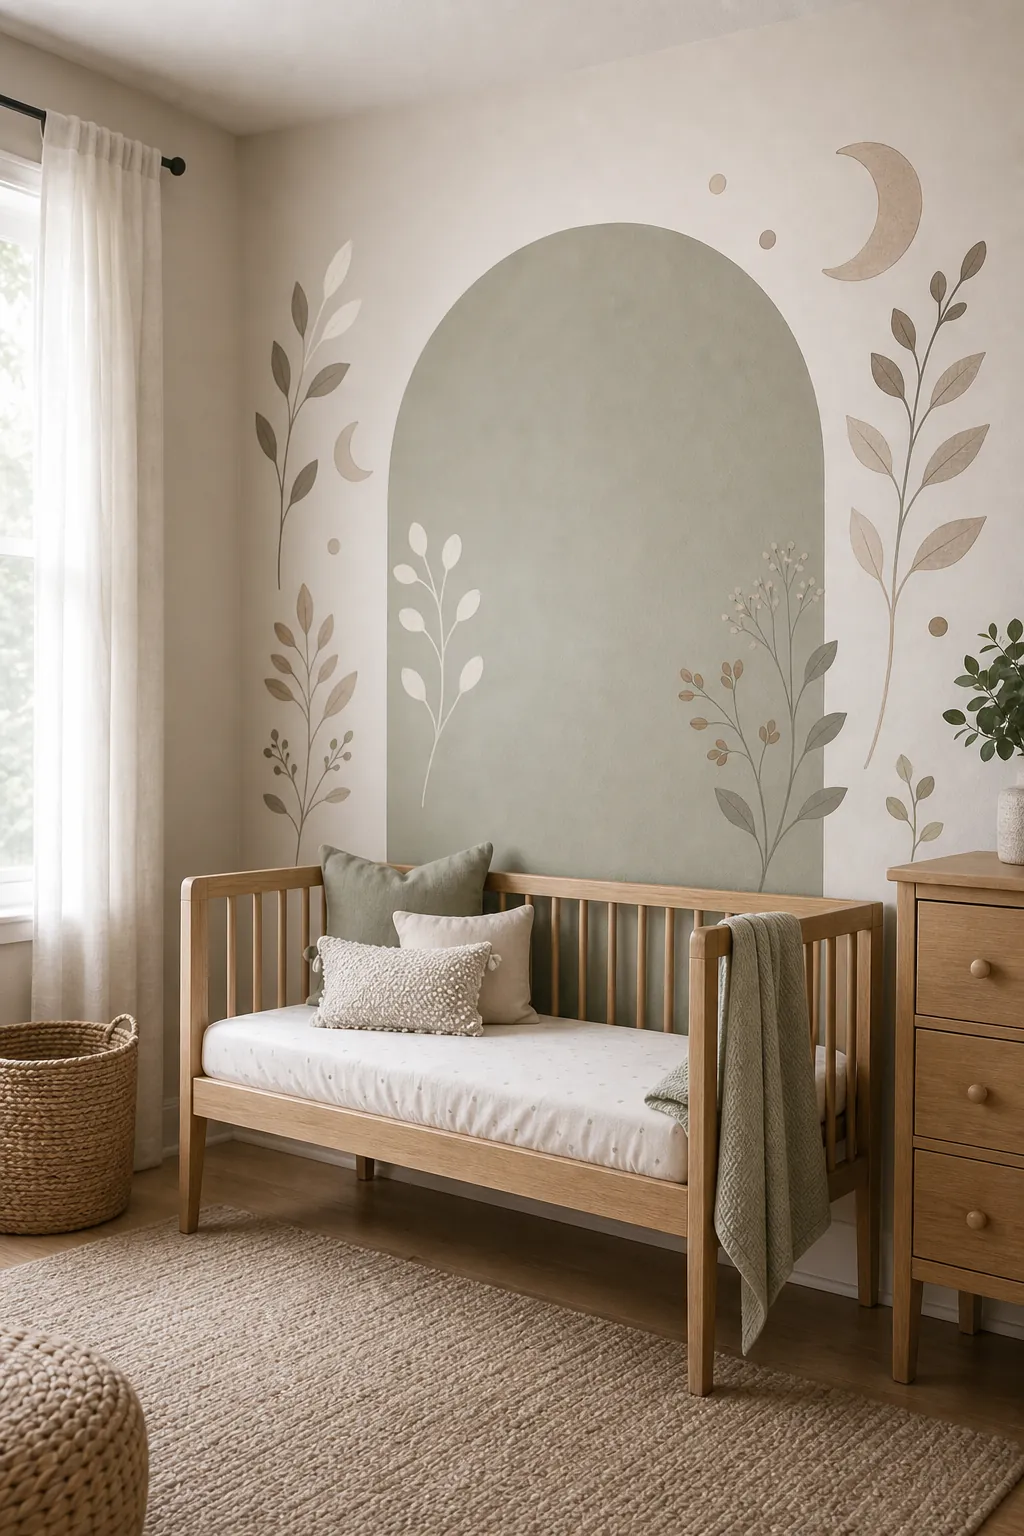
Mix Decals With Paint for a More Custom Look
Some of the best nursery wall painting ideas are not complex murals. A half-painted wall, soft arch, narrow painted border, or color-blocked corner can give baby room decals a designed frame. Paint creates structure; stickers bring detail. Together, they can look more intentional than either option alone.
This is also useful when you like the idea of baby room wall painting but do not want to hand-paint tiny details. Paint the simple shape first, let it cure fully, then apply decals inside or around it. A pale green arch with cream botanical decals, a warm beige half wall with floating stars, or a soft taupe corner with oversized blooms can feel personal without requiring mural-level skill.
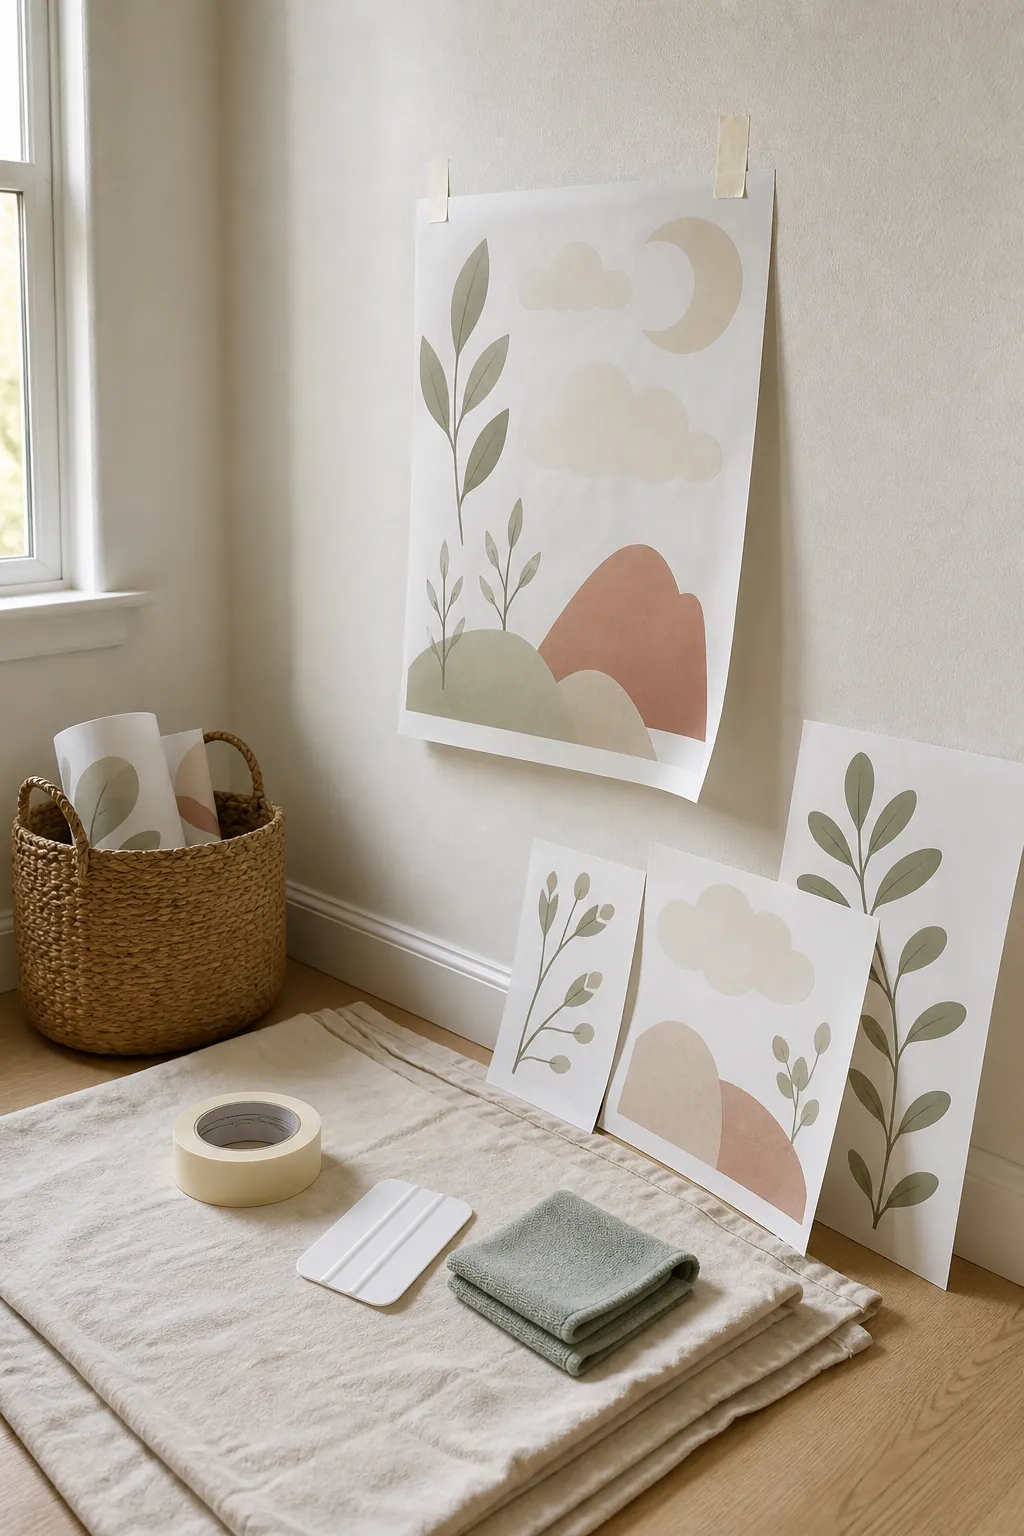
Plan the Layout Before You Peel
Lay the decals on the floor first and take a quick phone photo of the arrangement. Then use low-tack painter’s tape to test the placement on the wall before removing the backing. Keep the highest-detail pieces near eye level and leave extra space around shelves, curtains, sconces, and framed art.
Work from the center outward, smoothing slowly to avoid trapped air. If a decal is large, use a second person when possible, or tape the top edge as a hinge before peeling the backing down in sections. Do not rush corners and thin stems; those are the areas most likely to lift if they are stretched during application.
- Clean the wall gently and let it dry completely.
- Mark furniture height with painter’s tape before deciding final placement.
- Keep decals clear of heat vents, humidifiers, and direct steam.
- Press edges last with a clean smoothing tool or soft cloth.
Pick Themes That Still Work After the Baby Stage
The strongest nursery wall stickers are easy to reinterpret later. Botanicals can become a toddler reading corner. Stars can become a calmer sleep space. Abstract rainbows, clouds, hills, moons, and soft landscape shapes can shift with new bedding and artwork. This is why subtle nursery wall decals often outlast highly specific baby themes.
If you want a sweet baby room now and flexibility later, keep the permanent elements simple and let the stickers carry the personality. Choose furniture, paint, and curtains you would still like in three years. Then use decals for the charm, color, and theme. That balance gives you the joy of a finished nursery without making the room hard to change.
For most homes, nursery wall stickers are the practical middle ground between blank walls and a full mural. Test the surface, keep the palette calm, choose a single feature wall, and let scale create the impact. Done this way, they can look thoughtful, photograph beautifully, and still leave you an easy path when the room is ready for its next stage.