Peel and Stick Wall Decals: Renter-Friendly Ideas That Look Finished
Peel and stick wall decals are easy to underestimate. The best ones do not just fill an empty wall; they solve a specific decorating problem without asking for paint, nails, paste, or a permanent commitment. That is why renters, nursery decorators, small-space owners, and anyone testing a style before going bigger keep coming back to them.
The catch is that peel and stick is not magic. A wall decal can look polished for years, or it can curl at the edges, trap bubbles, or pull paint when it comes down. The difference usually comes from prep, scale, surface choice, and removal technique. Treat wall decals like a light installation project, not like a sticker you slap on in five minutes.
Start With the Wall, Not the Decal
Most disappointing decal projects start with the pattern instead of the surface. Smooth, clean, fully cured paint gives vinyl wall stickers the best chance of staying flat and removing cleanly. Rough orange-peel texture, dusty walls, fresh paint, bathroom humidity, and chalky older paint are the common failure points.
If the wall was recently painted, wait before installing. Paint can feel dry long before it has cured enough for adhesive. If you are renting and do not know the paint history, test one small piece in a low-visibility area for a few days. A test patch is boring, but it is cheaper than repainting a wall.
- Wipe dust and fingerprints with a barely damp microfiber cloth.
- Let the wall dry completely before applying any decal.
- Avoid installing over peeling paint, heavy texture, damp patches, or greasy kitchen residue.
- Test a small sample before using large peel and stick wallpaper decals.
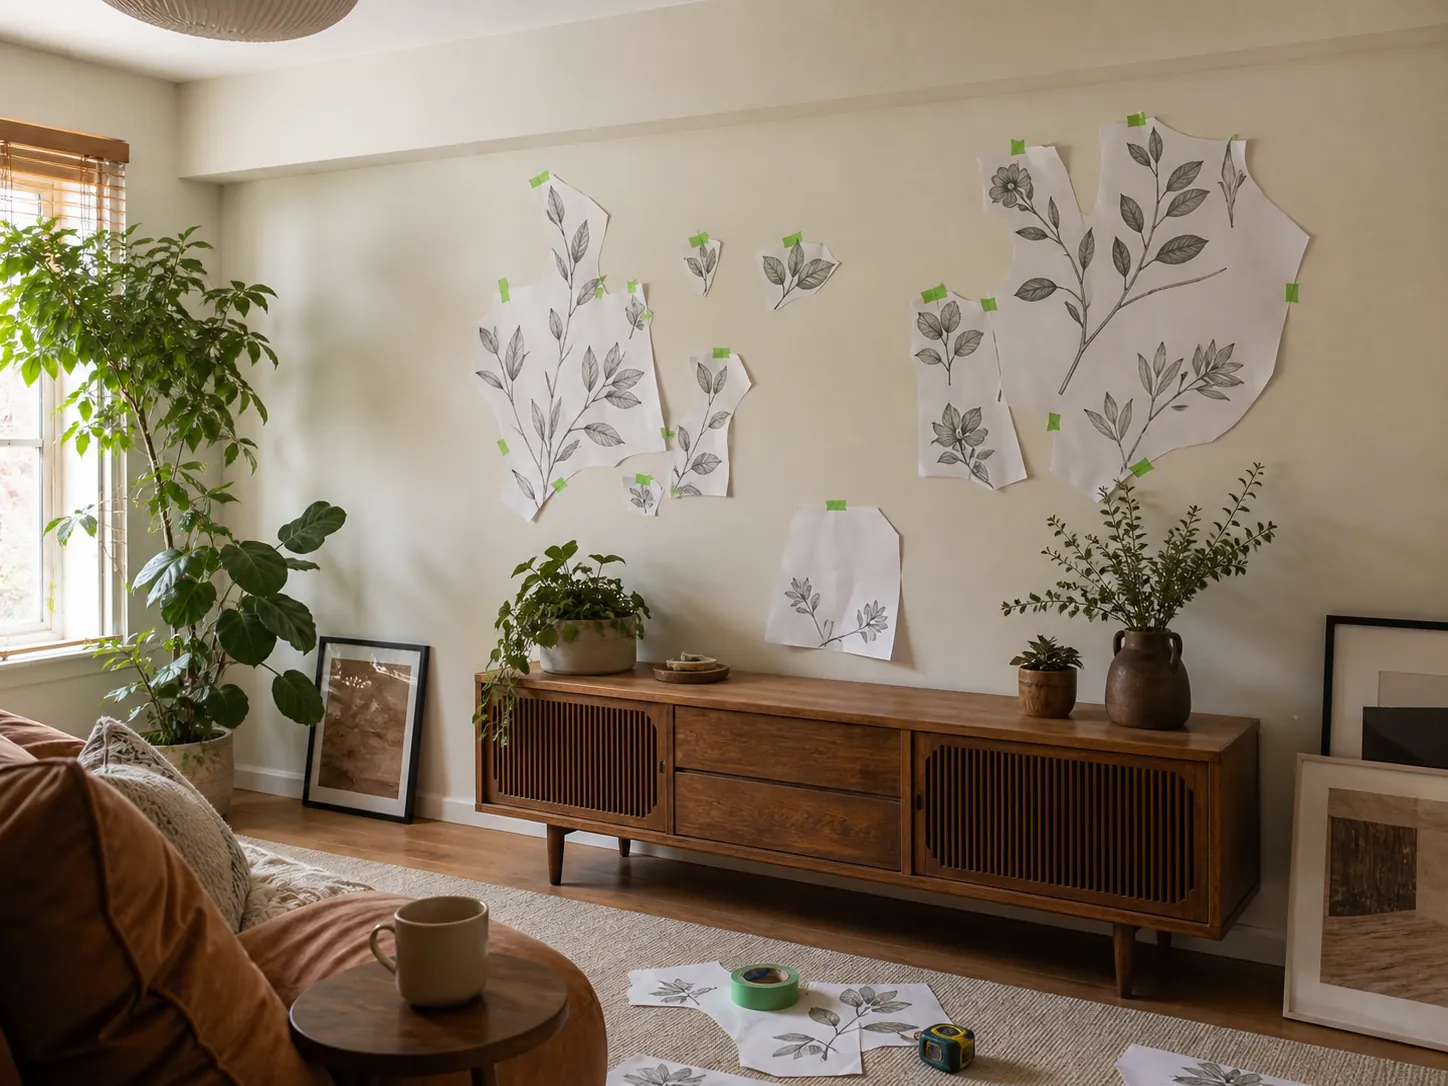
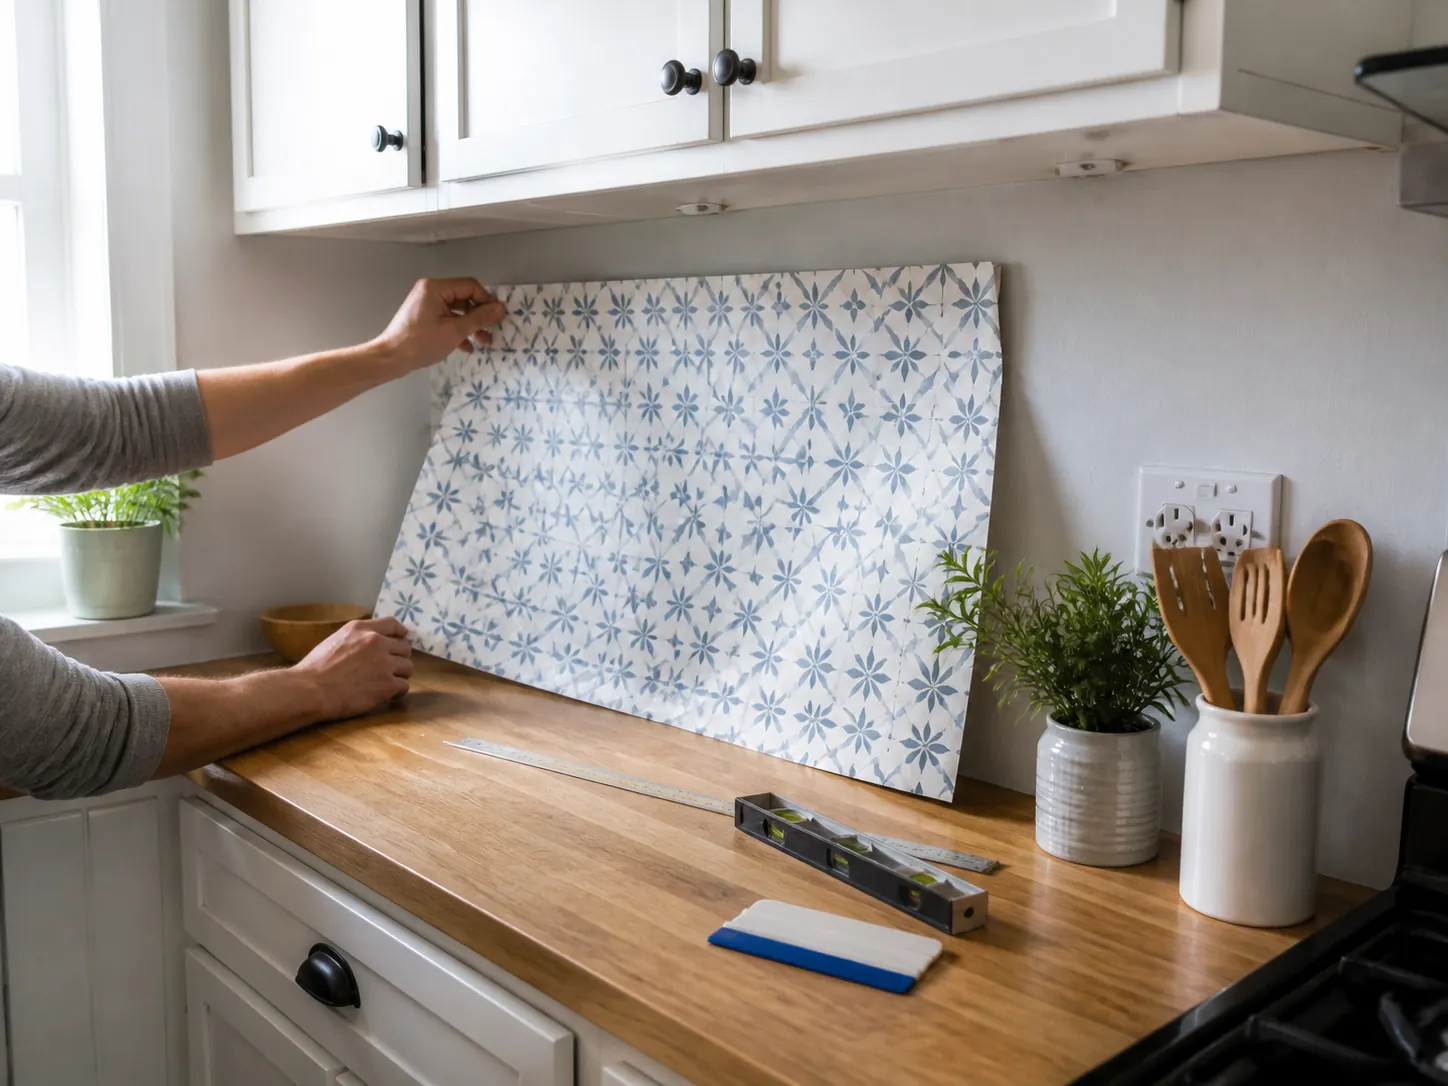
Plan the Layout Before You Peel Anything
Wall decal ideas look effortless when the spacing feels intentional. The easiest way to get there is to mock up the arrangement with paper templates or low-tack painter’s tape before touching the adhesive backing. This matters most for botanical decals, quote decals, vinyl wall stickers in mixed sizes, and gallery-style clusters.
Stand back from the wall and look at the whole room, not just the decal sheet. A small sticker can look lost above a sofa. A busy pattern can crowd a nightstand. A tall decal may need to align with a door frame, headboard, mirror, or shelf so it feels built into the room.
For living rooms, leave breathing room around the main shape. For bedrooms, use the bed, headboard, or dresser as the anchor. For kids’ rooms and nurseries, place decals where they are visible but not within easy peeling reach. Good placement makes removable wall decals look designed instead of temporary.
Use Bedrooms for Soft, Low-Risk Impact
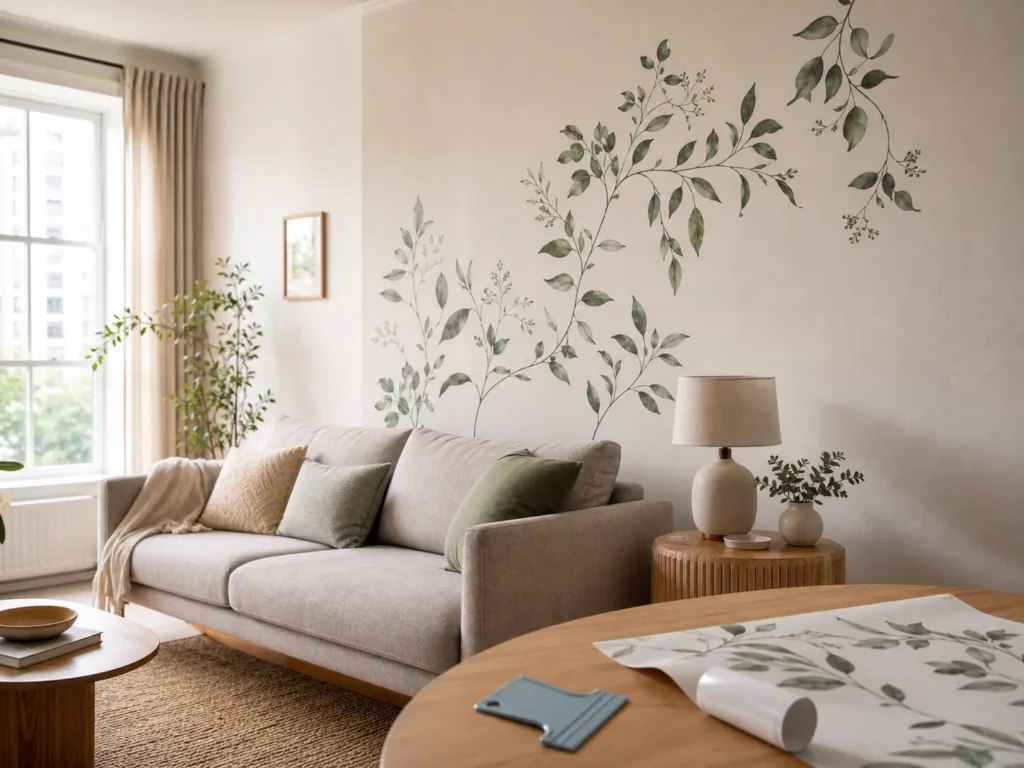
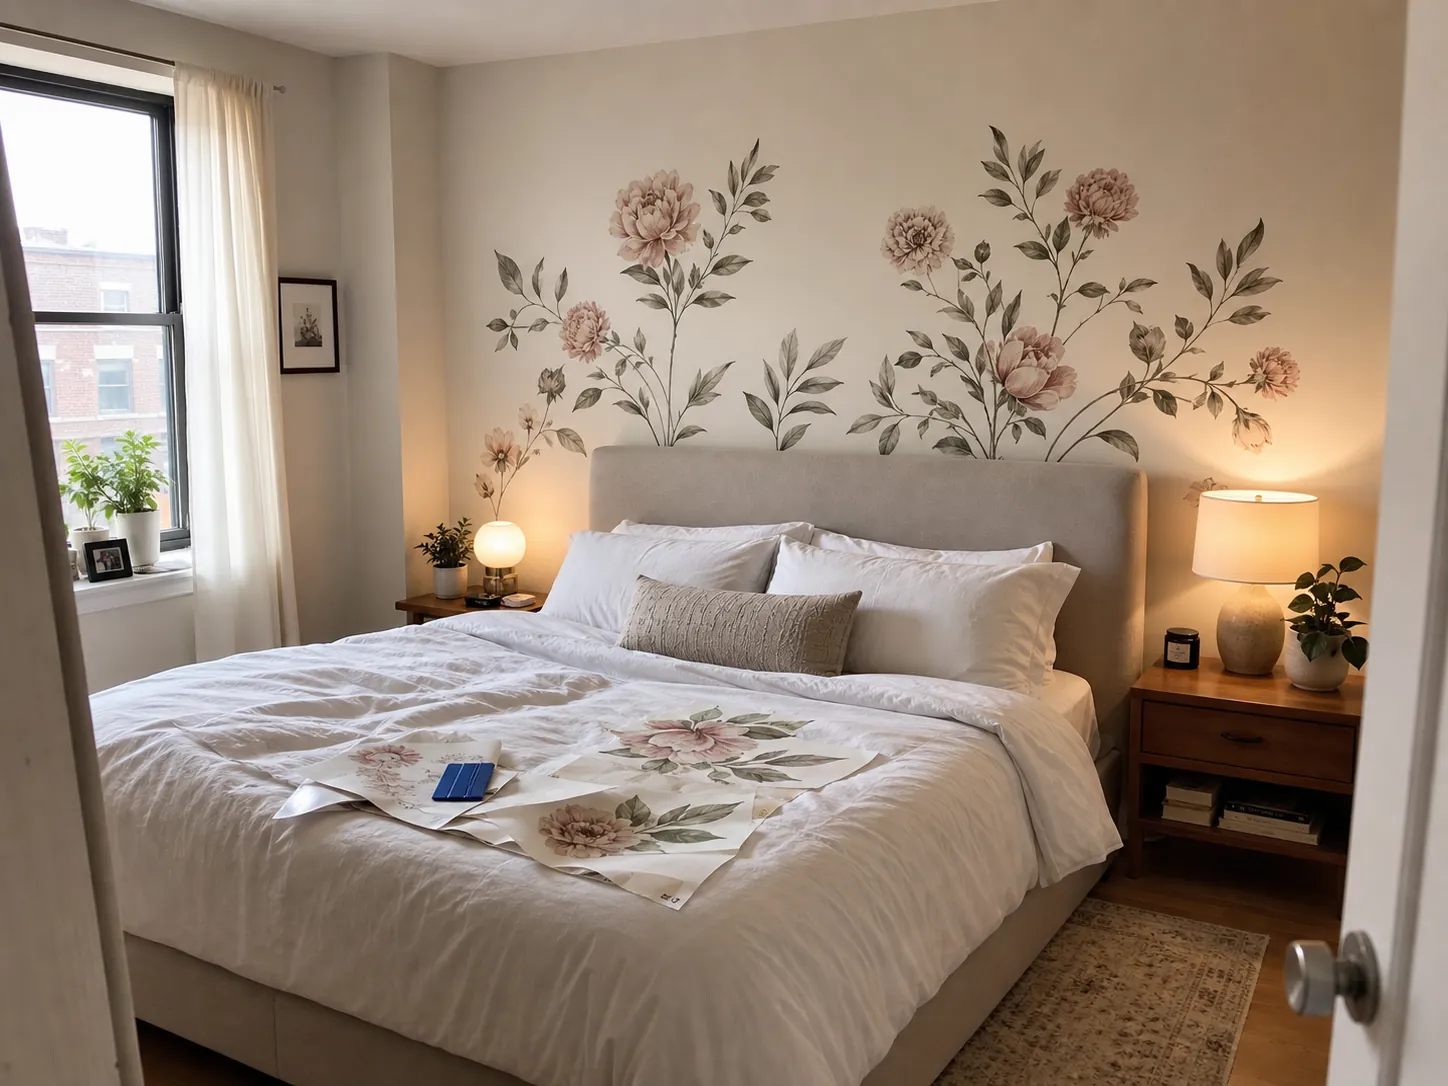
Peel and stick wallpaper bedroom projects work well because bedrooms usually have fewer moisture and grease problems than bathrooms or kitchens. A headboard wall is the safest place to start: it gives the decal a clear role, frames the bed, and does not require covering every inch of wall.
Floral peel and stick wallpaper, scattered leaf decals, arch shapes, and soft geometric vinyl wall stickers all work when the scale matches the furniture. If the bed is wide, choose a decal arrangement that spans at least two-thirds of the headboard width. If the room is small, keep the decal color close to the wall color so the effect feels layered rather than loud.
For wall decals for bedroom spaces, avoid placing tiny stickers too high. Eye-level clusters feel more intentional than a few pieces floating near the ceiling. If you want a calm room, choose fewer, larger pieces instead of many small ones.
Be More Selective in Kitchens and Busy Rooms
Peel and stick wallpaper kitchen ideas are tempting because a small backsplash area can change the whole room. The surface choice matters more here. Steam, cooking residue, and constant wiping can shorten the life of adhesive decals. Choose smooth, clean, low-splash areas whenever possible.
A small decal panel behind open shelving, a breakfast nook accent, or the side of a pantry wall is usually safer than the wall directly behind a sink or stove. If you want the look of tile, line up the first panel carefully and use a level. A crooked first piece makes every later piece harder.
In high-traffic rooms, think about hands, chairs, bags, and pets. Decals on narrow hallway corners or right above a chair rail get rubbed more often. The more a wall gets touched, the tougher and simpler the decal should be.
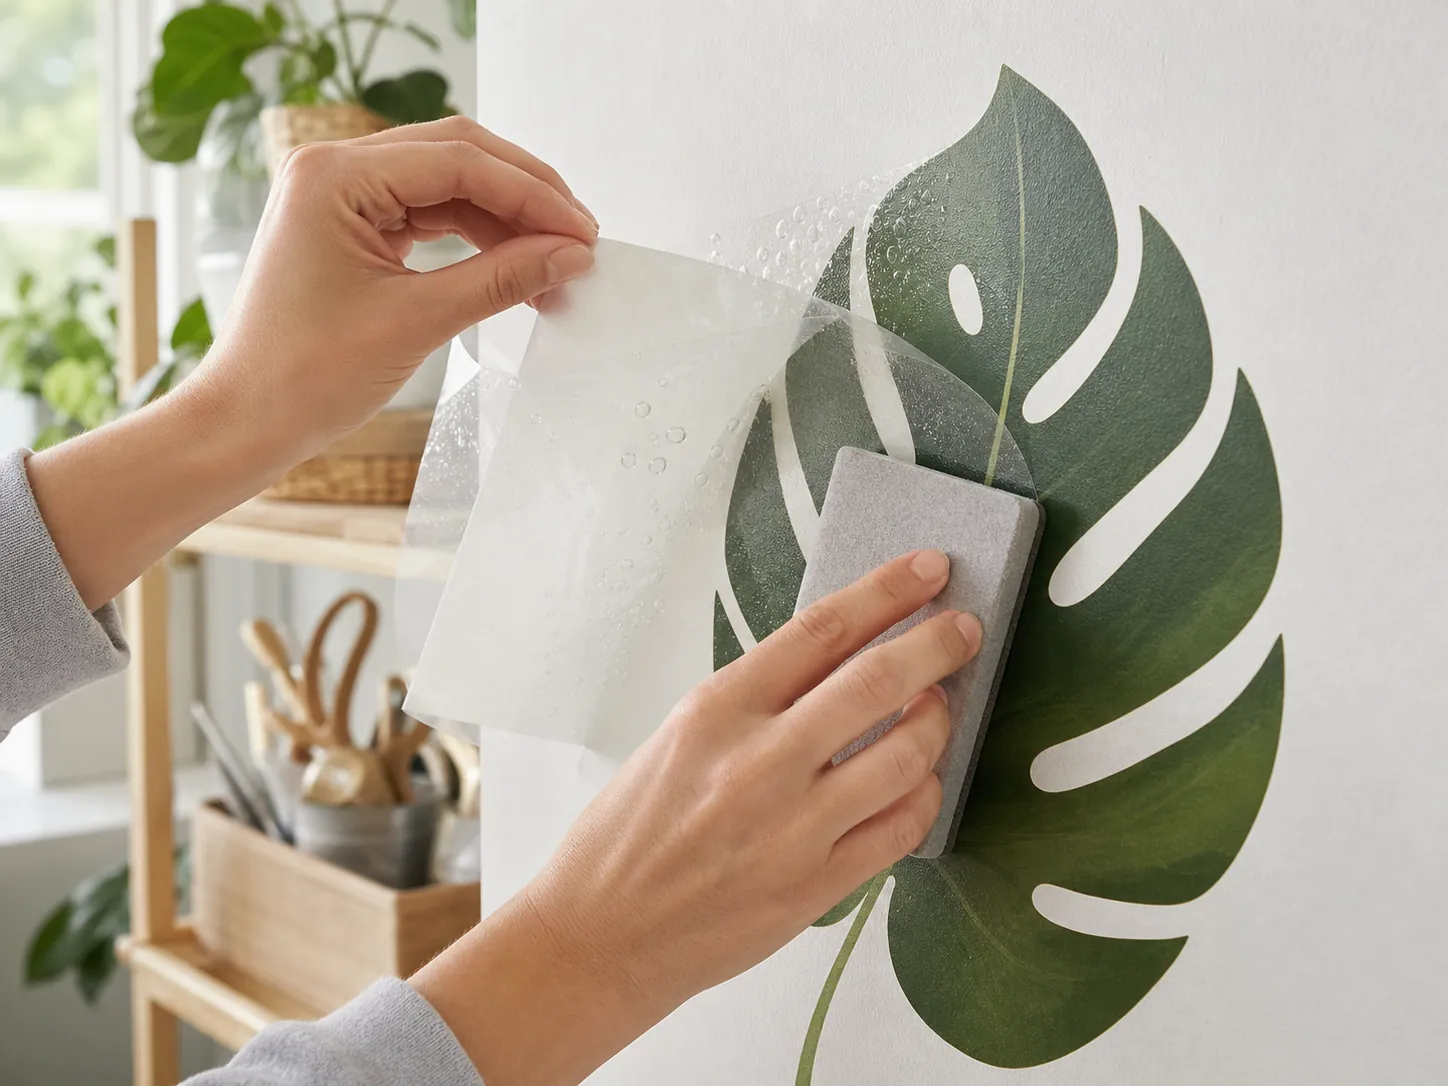
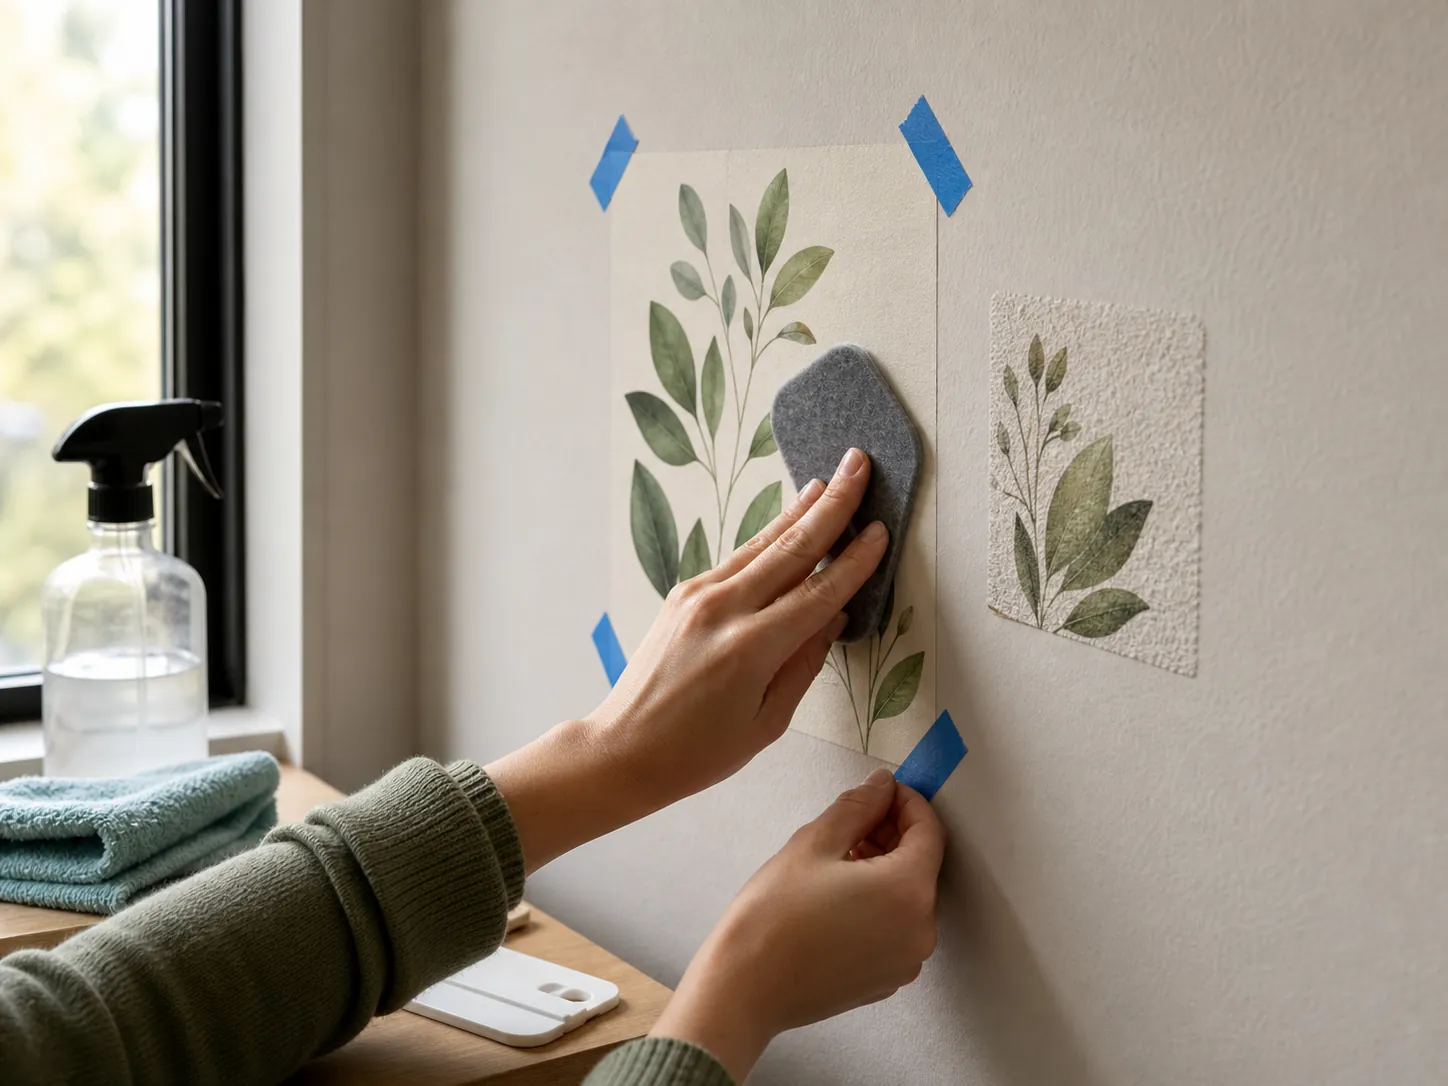
Install Slowly Enough to Avoid Bubbles
The cleanest installs happen in small sections. Peel back only part of the backing, anchor the top edge, then smooth from the center outward with a felt squeegee or a clean cloth. Pulling the whole backing off at once is how large decals fold onto themselves, stretch, or trap dust.
If a bubble appears, do not panic. Small air pockets can often be pushed to the edge. For larger decals, lift the vinyl gently and re-smooth before the adhesive has fully settled. If the decal uses transfer tape, press the design onto the wall first, then remove the tape slowly at a sharp angle so the vinyl stays behind.
- Use a level for panels, borders, and repeat patterns.
- Keep the backing close to the wall instead of pulling it straight out.
- Work from the center toward the edges.
- Do not stretch thin vinyl; stretched edges are more likely to curl later.
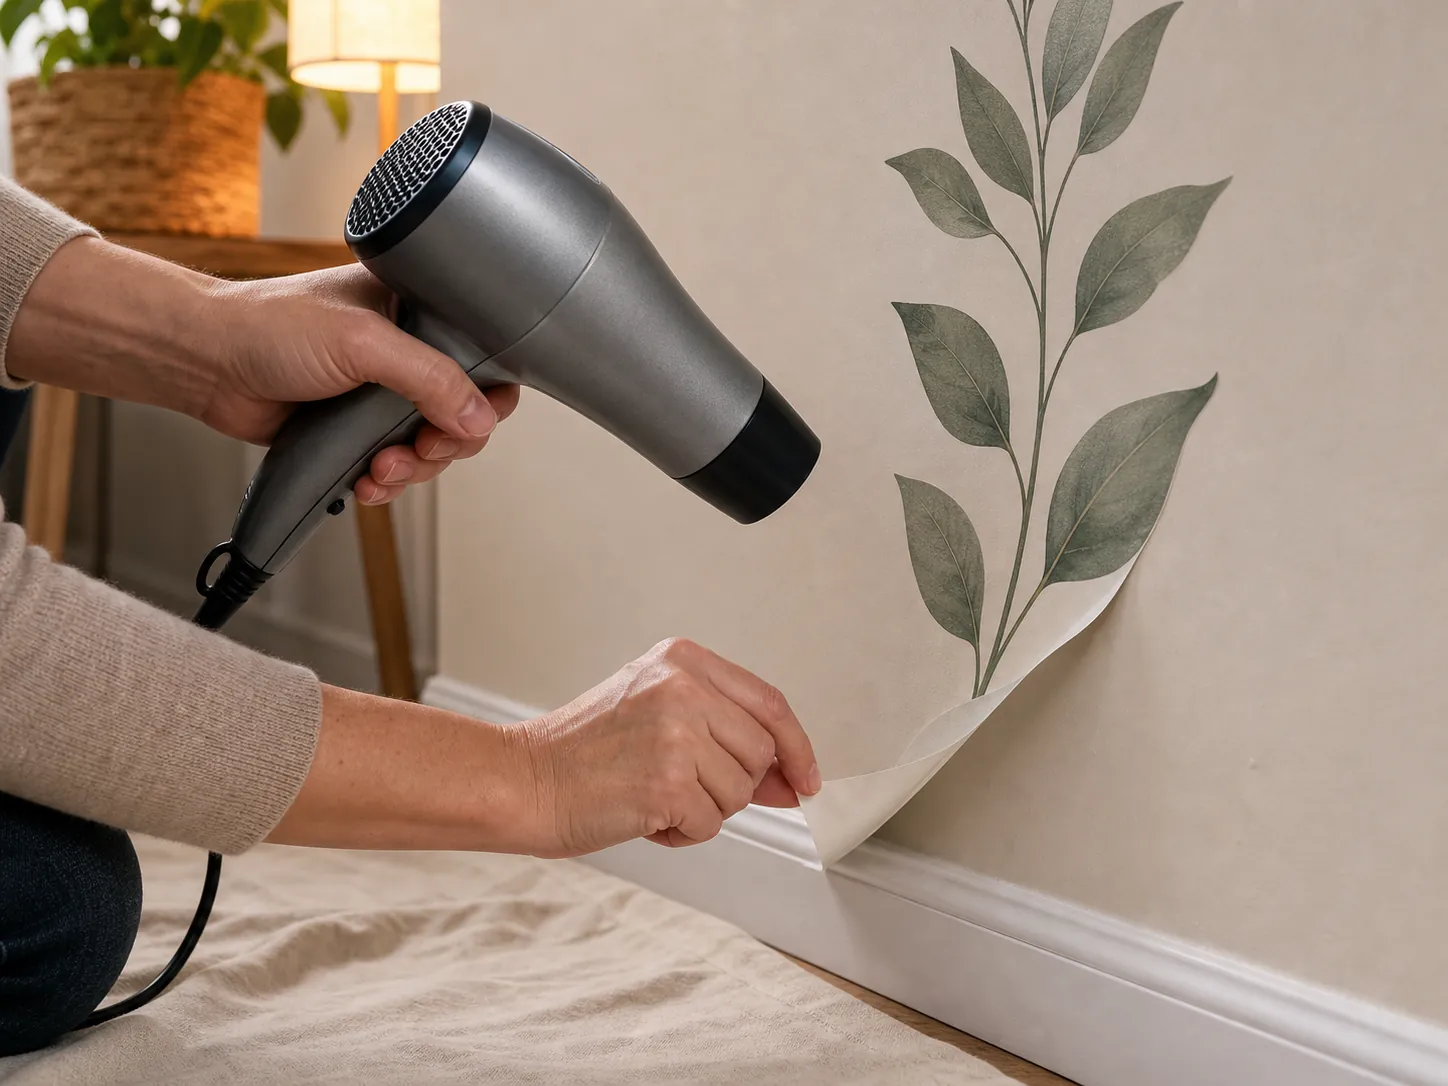
Remove Decals Like You Want the Paint Back
Removal is where renter-friendly wall stickers earn or lose trust. Start at a corner and peel slowly back against itself, keeping the angle low instead of pulling straight away from the wall. Low heat from a hair dryer can soften adhesive, especially on older decals or cooler walls.
If paint starts lifting, stop. Warm the area again, slow down, and change the peeling angle. Never yank a large decal because one corner came up easily. Adhesive strength can vary across the same wall depending on paint condition, sun exposure, moisture, and texture.
After removal, wipe away light residue with a gentle cleaner suited to your paint finish. Avoid harsh scrubbing first. The goal is not just getting the decal down; it is leaving the wall ready for the next tenant, next paint color, or next idea.
A Simple Buying Checklist
Before buying wallpaper decals, match the product to the room and the wall. Look for size photos, finish details, surface recommendations, and removal notes. If a listing only shows a perfect digital mockup and never shows a real wall, be cautious. Real vinyl has edges, scale, sheen, and limits.
- Choose removable wall decals for temporary rooms and rentals.
- Use peel and stick wallpaper panels when you want broader coverage.
- Pick vinyl wall stickers for crisp shapes, lettering, or custom designs.
- Order samples when the paint, wall texture, or room lighting is uncertain.
Peel and stick wall decals work best when they are chosen with restraint and installed with patience. Start with the wall condition, plan the layout, apply slowly, and remove with heat and a low angle. Do that, and a temporary decal can still make the room feel finished.