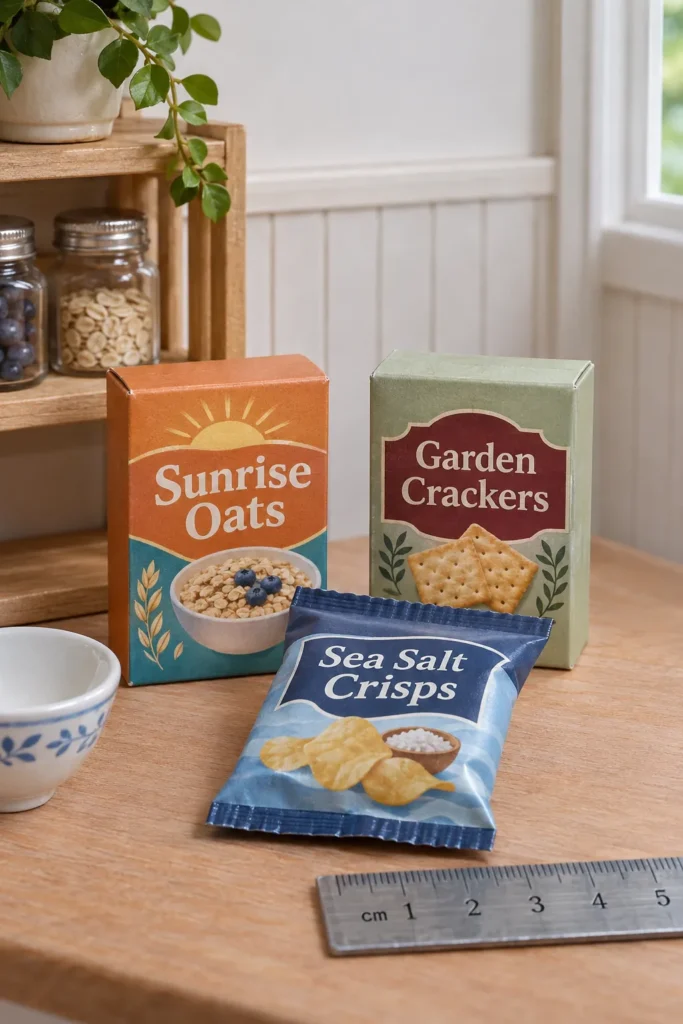
A miniature grocery shelf needs more than small front labels. A convincing package also needs side panels, closure flaps, glue areas, and folds that meet cleanly when the object becomes three dimensional.
These three resources provide complete forms for a cereal carton, a cracker carton, and a sealed snack pouch. Each design uses fictional branding, clear cut boundaries, dotted score lines, and concise assembly guidance.
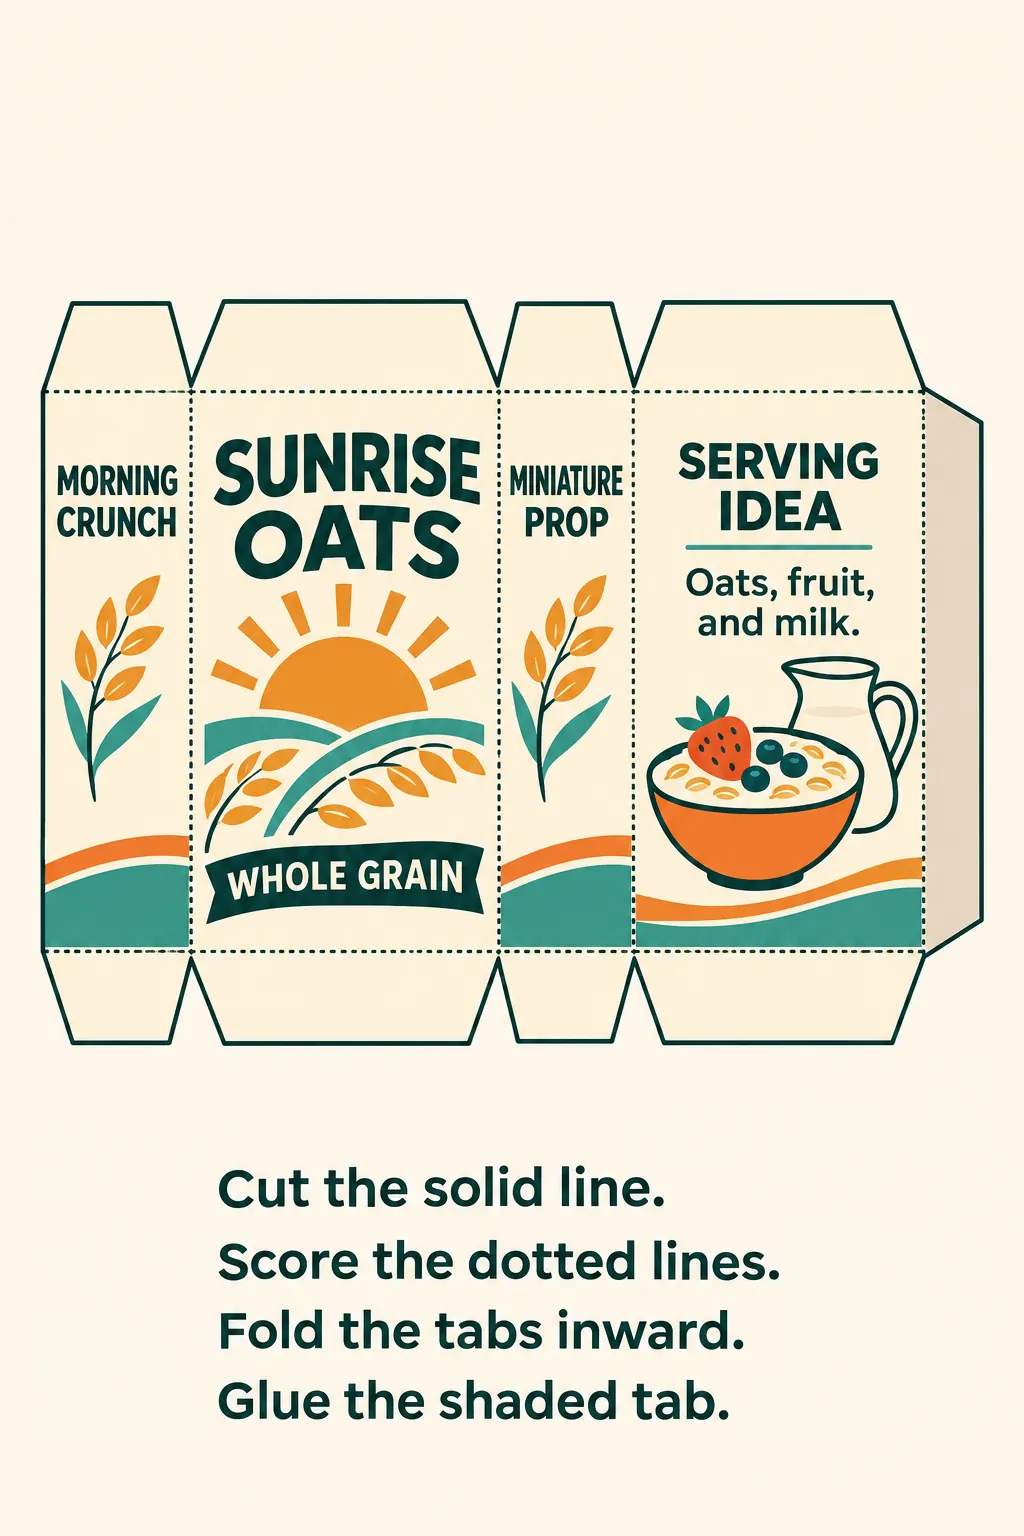
Sunrise Oats Cereal Carton
The Sunrise Oats sheet forms a rectangular pantry carton with front, back, and side graphics. Attached top and bottom flaps close the box, while one shaded side tab joins the body. The warm orange sun and teal oat sprigs create a cheerful grocery look without copying a real brand.
Download high-resolution printable
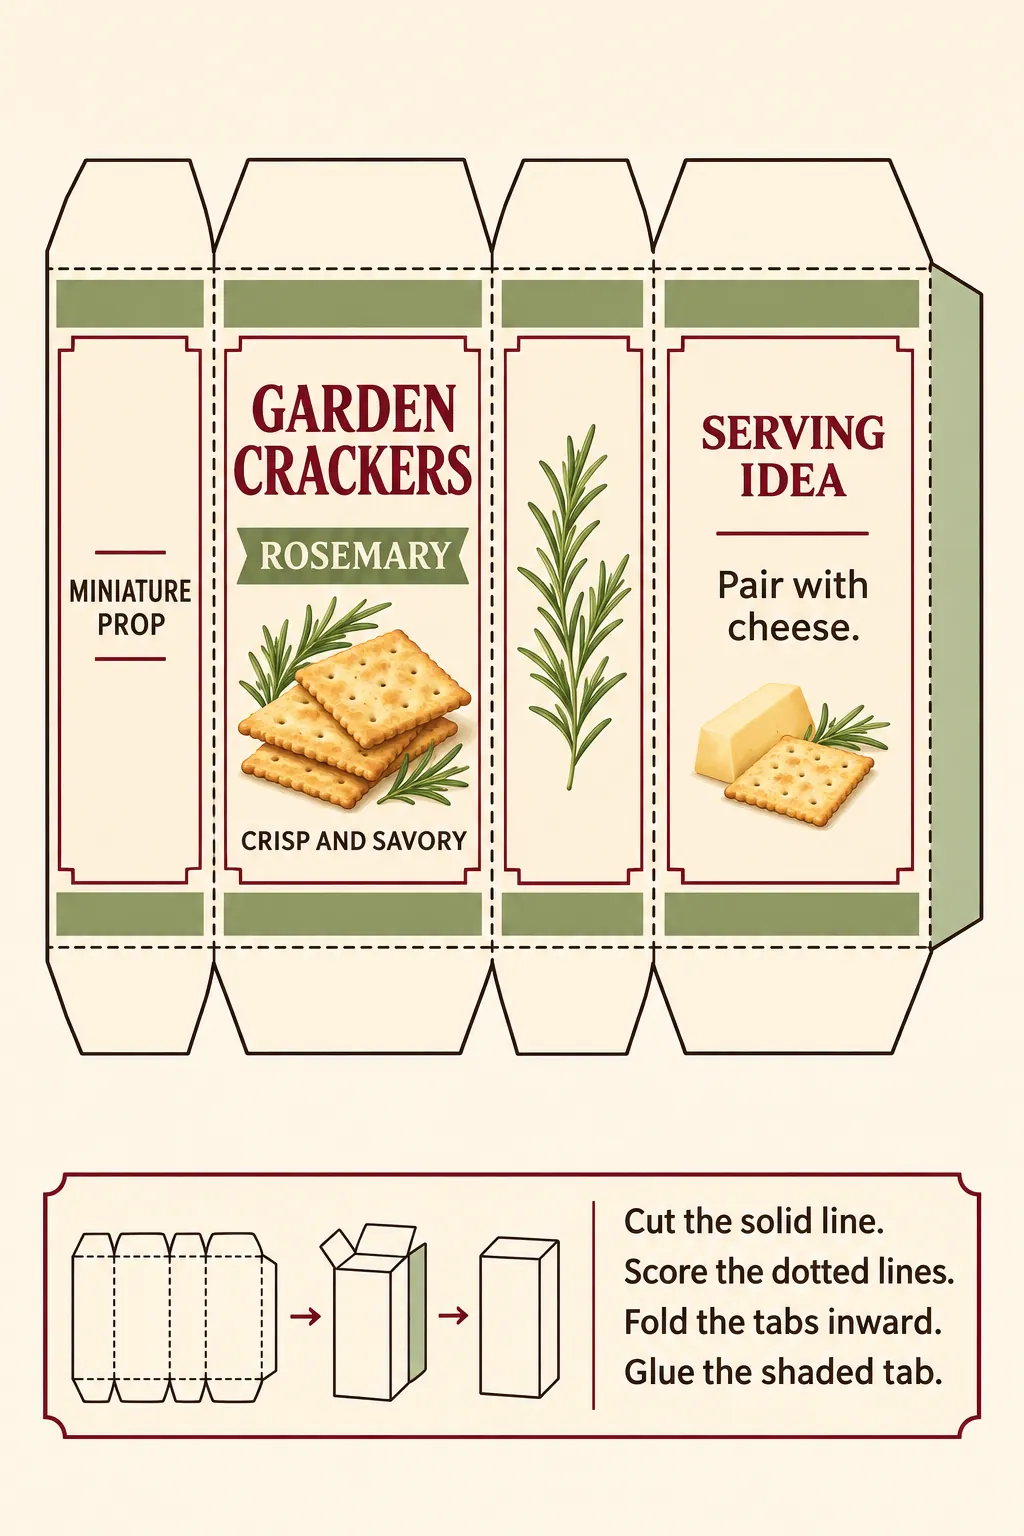
Garden Crackers Carton
The Garden Crackers net makes a slimmer box for a pantry, shop, or kitchen counter. Sage panels, burgundy type, rosemary sprigs, and a cracker illustration give every visible side a finished purpose. The complete closure flaps let the carton stand upright instead of collapsing into a flat sleeve.
Download high-resolution printable
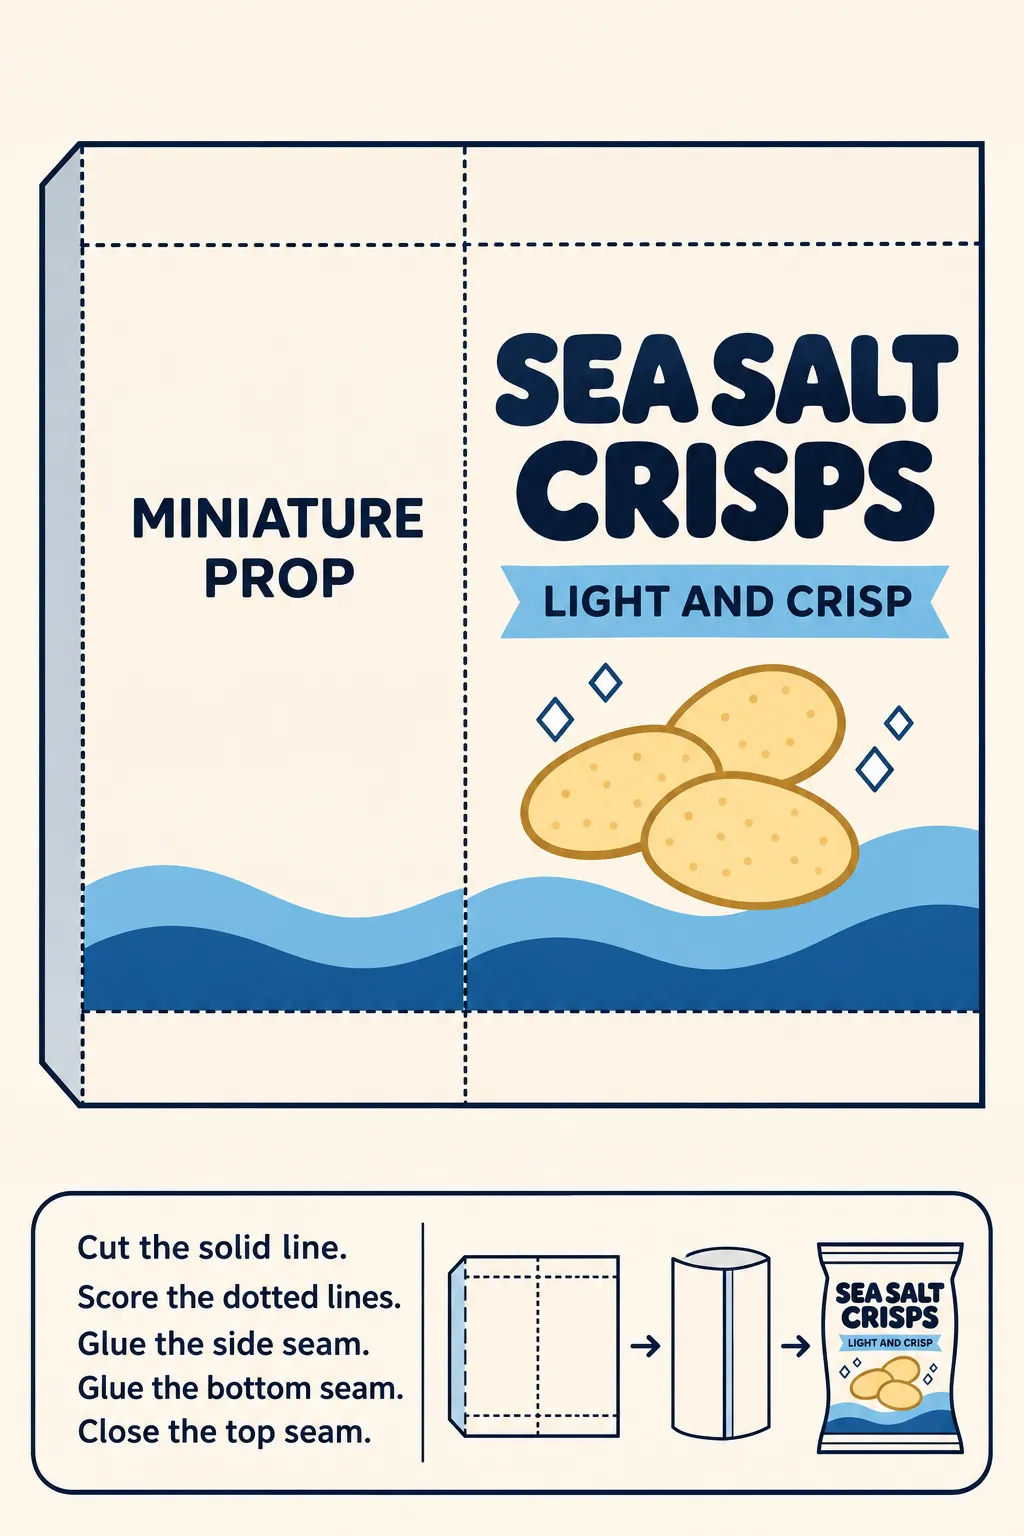
Sea Salt Crisps Pouch
This wrapper closes as a small pillow pouch rather than a carton. The shaded side seam joins the wrapper, and the top and bottom bands seal the ends. Thin paper gives the finished bag a gentle bulge, while the navy and blue design keeps the front readable.
Download high-resolution printable
Choose Paper and Print Size
Use ordinary printer paper or light matte presentation paper for the cartons. Heavy card can make tiny flaps spring open and can create bulky corners. A lightly glossy sheet can suit the crisp pouch, but test the ink first and let it dry before handling.
Print one full size test with automatic fit turned off. Compare the front panel with nearby dollhouse shelves and groceries before cutting all three designs. If you change the size, adjust width and height by the same percentage so every panel still meets its matching edge.
Score Before You Fold
Cut around the solid outer boundary and keep every flap attached. Place a ruler on each dotted line, then make a light crease with a blunt needle or bone folder. A clean score helps the printed surface fold without cracking and gives the package straighter corners.
Glue the Cartons and Seal the Pouch
For either carton, wrap the body first and attach the shaded side tab behind the opposite edge. Close the bottom flaps, allow the glue to set, then close the top. Use a toothpick to apply a very small amount of paper glue so it does not spread onto the printed panels.
For the crisp pouch, join the side seam and close the bottom band before shaping the bag. A tiny piece of tissue inside can give it a natural soft volume. Press the top band closed last, then hold each seam until the glue grips.
Check the Finished Shape
Set each dry package on a flat surface and check that it stands or rests as intended. Confirm that the front faces outward, the corners meet, and no glue tab remains visible. Keep the successful print percentage and paper choice with your project notes so later copies match.